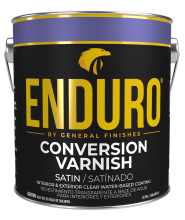
 Enduro Water-Based Conversion Varnish
 Enduro Water Based Stain Blocker Primer
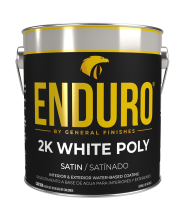 Enduro Water-Based Tintable 2K White Poly
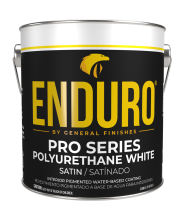 Enduro Water-Based Pro Series White Polyurethane
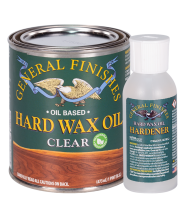 Hard Wax Oil & Hardener
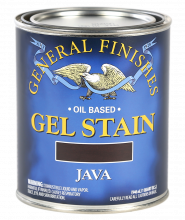 Gel Stains
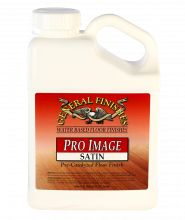 Pro Image Flooring Topcoat
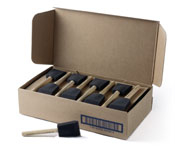 Jen Poly Brushes
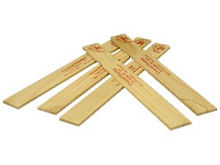 Stir Stix
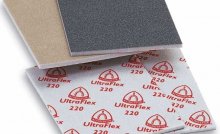 Ultraflex Softback Sanding Sponge
Begin with the end in mind
Wood finishing is fun and easy. Don't rush through finishing a piece of furniture as if it is a race. Imagine how it will look finished in your home in living color. Set up a good prep area. Turn on some tunes. Get creative and enjoy the journey. Make something that will bring beauty to your life, save you money, and have fun in the process. Take an a little extra time to get a good result.
If you are an experienced wood finisher, refer to our retail brochures for quick and simple finishing instructions. For those of you that like to know more, we'll take you step-by-step through the wood finishing process including preparing the wood, selecting the finish and applying traditional or decorative finishes.
Whether you're planning to finish furniture for your own home, make gift items, or take up woodworking as a hobby, you'll find wood finishing to be a rewarding experience. It's a practical skill that you'll take with you throughout life. Anyone can save money by finishing their own furniture.
The most critical part of finishing a piece of furniture happens before you open a can of stain or paint. A thorough sanding is often the factor that separates "acceptable" results from "professional-looking" results.
Tips for kit (unassembled) furniture: If you are assembling furniture, do so with an eye to the finished product. Do any major sanding required to make solid and flush joints and corners. Some find it easier to sand before the furniture is permanently assembled. Use caution when sanding individual pieces to avoid rounding over crisp edges that may form gaps when joined and glued.
Whether the project is a ready to finish piece of furniture, a freshly stripped old antique, a kit that needs assembly, now is the time to make minor repairs and do the finish sanding.
- Use crack filler to fill voids, nail holes and other imperfections. Crack filler should be sanded until it remains only in the void, and not on the surface of the wood.
- Excess glue on the surface of the wood must either be flushed and washed away with clean water while it is still wet, or allowed to dry and cut away with a sharp chisel or knife - any remaining spots or smears must be completely sanded away. Areas contaminated by glue will not accept stain.
Sanding preparation
We cannot stress enough that you must have a strong base of proper sanding to achieve the perfect finish!! See our sanding tutorial below if you want more details.
All surfaces should be clean and free from all dirt and oils. Prep sanding is done with progressively finer grits. Do NOT start sanding with very fine sandpaper on unfinished wood. Prepare the surface by using medium paper first, and then proceed to finer grades. On most raw woods, start sanding in the direction of the grain using a #120-150 grit paper before staining and work up to #220 grit paper.
Soft woods such as pine and alder: start with #120 and finish with no finer than #220 (for water base stains) and 180 grit for oil base stains.
Hardwoods such as maple and oak: start with #120 and finish-sand no finer than #180 (for water base stains) and #150 grit for oil base stains.
Do not over sand or you may seal the wood so much that it will not take a finish. End-grains (areas where the wood has been cut against the grain), such as the front side of a table, tend to soak up more stain than other surfaces. Give end-grain areas an additional sanding to control the absorption of stain.

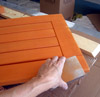
Make fast work of prep sanding! Shown here is an orbital power sander with dust bag used to prep the wood surface and buff out between top coats. Just use the correct grade of sandpaper when buffing out between top coats or milk paints. We often prefer to hand sand the final top coats.
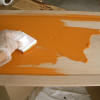
Do not use an orbital sander when distress sanding flat painted surfaces for an antiqued look. The orbital sander will dig in as you apply pressure to get through the paint, leaving round areas of wear that will not look natural. Natural distressing runs with the grain of the wood. This photo shows one coat of topcoat being buffed out over Lamp Back Paint.
Sanding tutorial ( for those that want to know more)
A sanded surface is nothing more than progressively finer and more numerous scratches. Therefore, skipping a grit leaves deep valleys that successive grits are hard-pressed to remove.
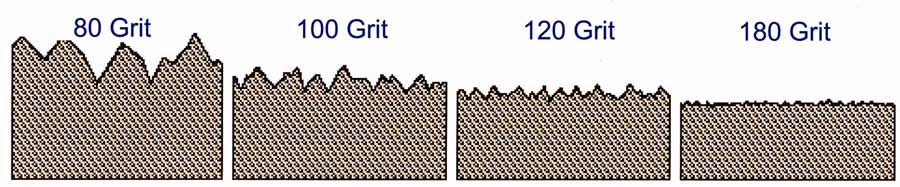
A general rule for the use of sandpaper is as follows - the finer the sandpaper used, the lighter the stain color will be. Conversely, the coarser the sandpaper used the darker the stain color will be. Remember that a coarser sanding job will look less refined than the smoother surface that comes from progressing through increasingly finer grits of sandpaper. Final sanding will bring the surface to the desired smoothness.
Sanding must be thorough, even and with the grain of the wood. If these criteria are met, no further sanding will be necessary. Since there are so many grades of sandpaper available, some knowledge of what the various designations mean and a little practice are useful in order to take advantage of this important tool. This chart is based on our experience and is intended as a guideline only.
Description | Grit # | 0 Grade | Use |
|---|---|---|---|
Very Fine | 600 | 10/0 | Polishing and finishing after staining |
400 | 0/9 | ||
360 | 8/0 | ||
320 | 7/0 | ||
280 | |||
240 | |||
Fine Medium Fine | 6/0 | Finish sanding before staining | |
220 | 5/0 | ||
180 | 4/0 | ||
150 | 3/0 | ||
120 | |||
Medium | 100 | 2/0 | Removing rough texture |
70 | 1/0 | ||
60 | 1/2 | ||
Coarse | 50 | 1 | Distressing, rounding and rough areas |
40 | 1 | ||
36 | 1.5 | ||
VeryCoarse | 30 | 2.5 | Very rough unfinished wood |
24 | 3 | ||
20 | 3.5 | ||
16 | 4 |
The number of identification or grit number on the back of sandpaper sheets indicates the smallest opening through which the abrasive particles will pass. For sandpaper marked 220 the abrasive particles will pass through a screen with 220 openings per linear inch.
The designation "Open Coat" indicates a particle distribution to prevent the paper from clogging. The adhesive used on wet or dry sandpaper is resistant to water, oils and paint thinner.
- The adhesive used on standard sandpaper is water sensitive.
- Cabinet grade sandpaper is backed with heavy paper.
- Finishing grade is backed with more pliable paper.
The types of abrasives commonly used for furniture finishing are garnet, aluminum oxide and silicon carbide. In general, red garnet paper is used primarily for hand sanding. Grey to white aluminum oxide is used for either hand or power sanding; black silicon carbide is the abrasive of choice for very fine sanding in the woodworking field.
Material | First Sanding | 2nd Sanding | Final Sanding |
|---|---|---|---|
Oak | 120 | 150 | 180 |
Birch | 120 | 150 | 180 |
Maple | 120 | 120 | 180 |
Mahogany | 150 | 180 | 220 |
Walnut | 150 | 180 | 220 |
Fir | 120 | 150 | 180 |
Pine | 120 | 150 | 220 |
Cherry | 120 | 150 | 220 |
White Ash | 102 | 150 | 180 |
Coarse sandpapers below 100 grit, are rarely used for fine furniture finishing. They may, on occasion, be useful for distressing the surface, rounding harsh corners, or breaking down extremely rough areas. The grades of sandpaper used most for furniture finishing fall in the fine and very fine categories - that is from 120 grit through 220 grit; with 320, 400 and 600 grit used for special purposes. For "hard to stain" woods, finish sanding with 120 grit will usually accommodate the problem.
For finish sanding on most furniture hardwoods (e.g., cherry and mahogany) use 180 grit or 220 grit. The use of grits up to 600 is certainly allowed but is not standard practice. Usually you will have to make a concession either to surface smoothness or to color acceptance. Factory sanded furniture still requires finish sanding.
Do the initial sanding with medium fine paper and finish with one or more of the finer grades. Be sure you sand the whole surface with the same grit paper. If you miss a spot, the stain will be darker on the rougher areas.
Do NOT use steel wool when preparing wood for water based finish, as steel particles may cause rust spots.
Sanding Blocks also make quick work. Great for corners and small places.
Color Selection
Color is determined by four factors:
You can mix General Finishes stains together to create custom wood tones or colors. Be sure to mix enough to complete the entire project.
Other preparation

Remove dust with an air hose, damp cloth or "oil free" tack cloths. Do not use tack cloths which contain linseed oil when using water based finishes. Oil free tack clothes are available from your local unfinished furniture or woodworkers store.
Optional pre-wetting of the wood when using water-based finishes. On certain woods such as oak and ash, pre-wet the wood with a damp cloth to raise the grain before final sanding. Allow the dampened wood to dry 30 minutes before the final sanding. This will provide a smoother final finish.
Stir the contents of the can every time you open it. And we mean stir. Whether you are using oil base or water base products, wood stains and milk paints contain colored pigments and dyes that settle to the bottom of the can and must be thoroughly mixed before application. It may take several minutes to thoroughly mix the contents of the can so that the color remains consistent as the contents are used up.
The open time with water base products is shorter than oil, so stain one surface at a time. Don't be stingy when applying water base products. Load up the foam brush or handi-painter with product and apply LIBERALLY, keeping the surface you are working on wet with product until you are ready to wipe that section off.
As you stain each area, remove excess stain by wiping with a cloth. It is important to wipe off the stain thoroughly and consistently (in the direction of the grain) to get an evenly stained surface. A second coat, applied after the first one is dry, will give you a darker and deeper color.
Look for ways to disassemble the furniture to make staining easier. Just by removing a few screws you can remove the back of a piece of furniture. It is worth the time.
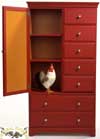
Custom mix colors!!! Don't let a color chart slow you down. Our water based products, Milk Paints, Water Based Wood Stains and Topcoats can be inter-mixed to create custom colors. Let your creative side come out and play! The interior color shown here and in the photo above is a blend of Red Pepper and Somerset Gold, mixed right in the can.
The tools you need
Before starting almost any wood finishing project, have these items on hand. Get enough gloves, sanding blocks, brushes, etc. Just like golf balls are in golf, supplies are the cheapest part of the game. Quality paper towels or lint-free absorbent wiping cloths.
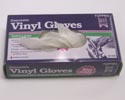
Use gloves, even with water base products. Get several pairs if you are planning to layer colors on your project. Applicators will rinse free very well, but the dyes and pigments in water based products can stain your hands.
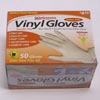
We prefer the snug fit of the latex-free gloves from your local pharmacy but any glove will work. When cleaning up your work area after using WATER BASED FINISHES, just grab all the wet application cloths in your gloved hand and peel the glove off your hand over the cloths for quick disposal. Never do this when using oil based products. All oil based application materials must be carefully disposed of in accordance with the standards of your local fire department.
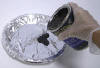
Aluminum foil and paper plates. Paper plates covered in aluminum foil provide the perfect container for application. Throw away the foil and reuse the plates. Remember, oil based products are combustible. Dispose of them in accordance with the standards of your local fire department.
Prepare raw wood surfaces using fine grit sandpaper such as #180-#220. Use #320 for sanding in between coats. 3M sanding pads can also be used between coats.
Choose your favorite application tools. You can apply any stain with an old rag or bristle brush, but we recommend the following.
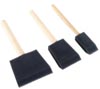
Use foam brushes for small surfaces and corners. Flimsy foam brushes fall apart in minutes - a good foam brush can be used several times. We prefer the Polybrush by JEN Manufacturing. Buy enough quantity to make life easy on yourself. We usually have several either in use, rinsed or drying. They can be stored after drying and reused several times.
Small old bristle brush for dragging excess stain or paint out of corners.
We love using Handi Painter paint pads for large surface areas. They make it easy to apply a lot of product to a section FAST, and are good for oil base or waterbase applications. Cut them in half to make two applicators. Note that when Handi Painter Pads are new, or cut in half, they shed. Be SURE to brush or rinse off any fuzz before using. The loose fibers will show up in the finish. If you are using waterborne finishes, they can be washed and reused many times.
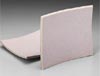
Don't work like a dog sanding anymore. Use soft back sanding sponges. They fit on standard palm sanders, are very flexible, easy to clean (rinse with water), and last a LONG time. They work great for buffing between coats of finish and are available in 4 different grades - fine enough to rub out finishes. Our favorite for final finishing is the 3M SUPERFINE grade.
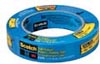
Use Blue Scotch 3M Painters masking tape to section off your project. Great for two tone finishes or for creating specialty looks such as this checker board pattern.
Clean up materials: paper towels, cotton swabs, mineral spirits and sealed metal containers, such as empty paint cans (for cleaning brushes, and, with the addition of water, for disposing of rags and waste soaked with oil finishes).
Old clothes are recommended. They are usually expendable, lint-free and make great Halloween costumes.
Work Area Tips
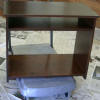
Cover the floor with drop clothes, news paper or plastic sheets. Cover enough floor area around your project to easily walk around it. Be mindful of the bottom of your shoes - don't walk through drips and then track onto finished flooring. If your project is small enough, put it on a dolly with wheels to easily access all sides. The dolly shown here was purchased at a hardware store and is useful for many other things around the house.
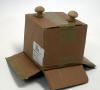
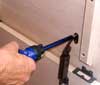
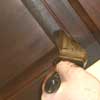
When staining door and drawer knobs, punch the knobs into the bottom of a cardboard box for easy finish application. Simply cut slots in the cardboard, and slide the screws (with the knobs attached) into the slots to make them free standing.
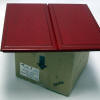
Use old boxes for drying racks for small pieces such as drawer fronts. Recycling bins work well too.
- The color of the stain.
- The nature of the wood species and how porous it is. Different species of wood absorb stain differently. Test the color on a hidden section of the wood you are using.
- How long the stain is left on.