We recommend using Colourfal Zero VOC colorants. Other colorant systems should be zero VOC, incorporated at the point of use, and tested thoroughly for performance before application. General Finishes will not be liable for in-can stability when other colorants are used.
Instructions
Step 1: Preparation for Paint
Before applying paint, all raw wood projects require preparation sanding, and all existing finishes require prep cleaning and sanding. If you skip this critical step, your finish may fail.
Preparation for Raw Wood Projects
See our video: How to Prep Sand Raw Wood
- Sanding schedule: 120-grit sandpaper followed by 150-grit. Do not over-sand with fine-grit sandpapers; this will close and seal the wood grain, preventing ideal color absorption. Do not use steel wool with water-based finishes; the particles will get trapped in the finish and rust.
- Remove dust with a vacuum, compressed air, an oil-free tack cloth or a water-dampened rag.
- Let dry completely before applying General Finishes product.
Preparation for Sealed Surface Projects
For high-use areas with heavy grime build-up and oil from hands, give your project a deeper cleaning.
See our video: How to Prepare Existing Finishes
- Scuff clean with a Scotch Brite™ pad or maroon synthetic steel wool and a 50:50 mix of denatured alcohol and water. Dry 1-2 hours. Avoid cleaning with products containing phosphates (salt), which can linger in the substrate and produce a white haze. If your project requires a deeper cleaning, see Power Prep Cleaning Highly Used Existing Finishes below.
- Sand lightly with a fine-grade (220-320) foam sanding sponge or 400-grit sandpaper.
- Remove dust with a vacuum, compressed air, an oil-free tack cloth or a water-dampened rag.
- Let dry completely before applying General Finishes product.
Power Prep Cleaning Highly Used Existing Finishes
See our video: How to Power Prep Existing High Use Finishes for Stain or Paint
- Scrub clean with a detergent, such as Spic and Span or Dawn, using a Scotch Brite™ pad.
- Rinse well with water.
- Scrub clean with a Scotch Brite™ pad and a 50:50 mix of denatured alcohol and water. Dry 1-2 hours.
- Sand lightly with a fine-grade (220-320) foam sanding pad.
- Remove dust with a vacuum, compressed air, an oil-free tack cloth or a water-dampened rag.
- Let dry completely before applying General Finishes product.
Alternative Cleaning Solutions For Existing Finishes (Not as aggressive or effective as denatured alcohol; requires rinsing.)
- 50:50 mix of bleach and water
- 50:50 mix of vinegar and water
- Mineral spirits can be used when working with water-based products, but only if the surface is thoroughly rinsed and allowed to dry for 72 hours.
Step 2: Priming
A base coat of primer is not required to use General Finishes Milk Paint. If applying a primer, use Enduro White Undercoat or Enduro Deep Base Primer. However, use 2 coats of Enduro Stain Blocker when tannin bleed-through is a concern.
Watch Stain Blocker Product Overview video Here
- RAW WOOD: Before using white & light-colored paints, apply 2 coats of GF Stain Blocker or GF White Undercoat. Raw Wood Tannin Bleed-Through is unpredictable; yellowing can appear immediately or months later with seasonal temperature changes. Oak, pine, mahogany and Douglas fir are particularly prone to bleed-through.
- SEALED SURFACE: Before using white & light-colored paints, apply 2 coats of GF Stain Blocker. Sealed Surface Bleed-Through may be caused by previous stains or aniline dyes, surface contamination, and incompatibility between brands.
- Knots in Wood contain rosin (sap) and are dense, making paint adhesion a challenge. Pine knots are especially difficult to cover with white or light paints. If you decide to paint over them, apply 3 coats of Stain Blocker over the areas with knots first; however, we cannot guarantee against rosin bleed-through. You are better off using a dark paint on pine.
- Dark Paint Colors Over Sealed Surfaces: To improve coverage when applying darker colors such as Coastal Blue, or Queenstown Gray, prime with Enduro Deep Base primer.
- Non-Wood Surfaces may be able to take paint if primed first. Primer may improve adhesion over laminate and prevent bleed-through from MDF. Metal requires a primer made specifically for metal.
NOTE: Do not tint Stain Blocker or use Stain Blocker on projects that will be stored outdoors.
Priming Non-Wood Surfaces for Paint
Always test for adhesion on a hidden area of your project before getting started.
Metal: General Finishes Milk Paint is engineered for wood surfaces, but may adhere to metal, such as aluminum or steel, if a metal primer is applied first.
- Clean surface well.
- Apply primer.
- Dry 48-72 hours before painting.
Laminate: Milk Paint MAY adhere to laminate with a bonding primer; however, we cannot guarantee it. You may increase your chances of success by abrading the surface.
- Prep: Deep clean, dry thoroughly, sand with 150- then 180-grit sandpaper and wipe off dust.
- Prime: Apply bonding primer, dry 12+ hours before painting.
MDF: Milk Paint can be applied directly to MDF, but the MDF may cast a brown color if not primed first. Two base coats of white-pigmented shellac-based stain-blocking primer, or Stain Blocker, may prevent bleed-through. Alternatively, one base coat of General Finishes Seagull Gray Milk Paint may block brown tone caused by MDF.
MDF is not as absorbent as natural wood. Let each coat of primer and paint dry at least 48 hours before re-coating.
Fiberglass: Milk Paint can be applied directly over fiberglass without primer. We do not recommend applying other General Finishes products over fiberglass. Gel Stain may adhere to fiberglass, but it is not an exterior rated product.
Disclaimer
Although Stain Blocker is engineered to prevent the most persistent bleed-through when two coats are applied, General Finishes cannot guarantee prevention of bleed-through or yellowing on every project. Unknown factors and assiduous bleed-through can impact results. Stain Blocker is the strongest option we are aware of at this time and has performed extremely well in our tests.
Step 3: How To Apply General Finishes Milk Paint
CAUTION: Do NOT use any type of clear topcoat over white or light GF Milk Paint Colors, as it may cause yellowing when used over wood substrates. GF Milk Paint is a premium self-sealing finish and does not require a topcoat. If you want a white paint with a higher sheen, use GF White Poly (spray only). Darker colors can be top-coated if a higher sheen is desired.
Watch our Milk Paint Product Overview Video Here
Join General Finishes University Facebook Group at https://www.facebook.com/groups/generalfinishesuniversity for customer support and learning opportunities for GF products. This group is a great resource for guidance regarding choosing the right product, mastering finishing techniques, troubleshooting, or sharing your finished projects.
Download 2024 Milk Paint Brochure Here
General Finishes Milk Paint Application Steps
Substrate: Wood (See below for other substrates)
- Watch product overview video here. 2:18 minutes.
- Work in a well-ventilated area.
- Stir paint to reincorporate solids that have settled to the bottom of the can before and throughout the application process.
- Thin as desired with distilled water; start with 5%, adding up to 10% by volume. Do not use flowing agents such as Floetrol. This paint already contains a flow agent and outside products may not be compatible.
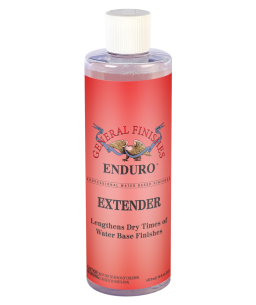
- Increase open time, if needed, with up to 10-15% General Finishes Enduro Extender if allowed by local regulations. GF Extender will improve flow and leveling and increase open time, which is helpful in dry climates. California Residents: Adding more than 2% of GF Extender will make the products non-compliant per SCAQMD Regulations. GF assumes no liability for the improper use of these products.
- Apply as many coats as needed for desired coverage. 2-3 coats are standard but additional coats may be required when using colors with less "hide properties," such as bright reds, greens, yellows and whites.
- Hand application: Using a synthetic bristle brush, foam brush, pad applicator, or microfiber roller such as Whizz or AllPro brand, apply using smooth, even strokes.
- Spray application: See video tutorial on spraying Milk Paint. Before spraying, strain paint through a medium-mesh filter. Spray wet films at 3-5-mil thickness. HVLP: 1.8mm-2.0mm spray tip, medium air cap. Verify tip sizes with your equipment supplier. See our spray tip size recommendations here. Keep your gun at a 90° angle, 6-8" from the surface. On large, flat areas, use wet, even patterns 6-8" wide. For narrow surfaces, reduce the fan pattern to 2-3" wide to reduce overspray. Overlap each pass 25% to conceal lines. Wear full filter NIOSH/MSHA-approved respiratory & eye protection. Read here for more information on spraying techniques.
- Face frames on cabinets: Milk Paint can be applied successfully to cabinet face frames, edges or drawer fronts with a brush, pad or small cabinet-specific roller such as Whizz or AllPro brand.
- Dry 2+ hours between coats and before General Finishes water-based topcoat in ideal conditions: 70°F/20°C; 50% humidity. Be sure to allow adequate dry time. You can tell if a water-based finish is dry if it forms a powder when lightly sanded with a fine-grade (220-320) foam sanding pad. If in doubt, wait longer. Rushing dry time can cause clouding/blush in topcoat due to moisture trapped between coats. Increase dry time if:
- Humidity is over 80%
- 3+ coats are applied
- Thick coats are applied
- Applying over an existing sealed finish
- Applying over products from other brands
- Layering General Finishes water- and oil-based products:
- Water over oil: Let oil-based products dry 72+hrs before applying water-based products
- Oil over water: Let water-based products dry 24+hrs before applying oil-based products
- To accelerate dry time in humid conditions, add General Finishes Accelerator and work in a space with good ventilation and air movement. If you decide to re-coat before the recommended time, test dryness.
- Finish sand between coats with a fine-grade (220-320) foam sanding sponge or 400-grit sandpaper to improve smoothness and adhesion. Do not use conventional steel wool.
- Remove dust with a vacuum, compressed air, an oil-free tack cloth or a water-dampened rag.
- Topcoat is not required but is recommended in certain situations. See "Step 4: Topcoat over Milk Paint" below.
Cure Time
Water-based finishes cure and harden for full use after 21 days in ideal conditions. Avoid placing heavy objects on surfaces that have not completely cured. Treat gently, and do not clean with commercial products during the curing period.
Notes on Color
- All white paints darken or yellow over time, but the change is more evident with bright whites, such as General Finishes Snow White Milk Paint.
- Some colors made in a clear base require additional coats for coverage due to their lower hide quality, e.g., reds, deep blues and yellows. Bright whites may require additional coats over dark existing finishes.
Warning: Do not use water-based products with Linseed Oils or Danish Oils.
Substrates:
The above instructions are for application over wood surfaces only.
Non-wood substrates require different application techniques and dry times. See website FAQs for more information.
With the proper application technique, Milk Paint can adhere well to:
- PVC
- Fiberglass
- MDF
- Wood
Step 4: Topcoat over Milk Paint
CAUTION: Do NOT use any clear coat over white or light paints such as it may cause yellowing. Any clear coat can become reactive over wood substrates, and turn slightly yellow. If you want a higher sheen with high durability, use Enduro Clear Poly or Enduro 2K.
Glossier sheens will boost durability and make the surface easier to clean.
Recommendations
General Finishes High Performance Topcoat and General Finishes Enduro Clear Poly dry crystal-clear and are great for darker colors for high-use surfaces. General Finishes Flat Out Flat is our flattest topcoat, only suitable for projects that do not receive major wear.
Topcoating General Finishes Snow White Milk Paint
Clear, water-based finishes can react with wood substrates and previous finishes, causing the topcoat to yellow. This is most evident when using bright white paints. To avoid potential yellowing, use 1-2 coats of spray-only Enduro White Poly as a standalone finish. See our FAQ: How Do I Prevent Water Based Topcoat or Light Colored Paint from Yellowing?
Cleanup of Water Based Products
Application tools and materials containing water-based products can be cleaned with soap and water or General Finishes Brush & Gun Cleaner immediately after use.
Product Spills
Spills may be able to be removed from fabric and carpet if cleaned immediately with soap and water.
Disposal
Discard unused product and waste in an environmentally safe manner; check with local fire and health regulation.
Storage of Water Based Products
Life of Product
General Finishes products do not last forever, even when unopened. They are best used within 1 year. The life of the product may be extended with proper can closure and storage conditions. (see Storage Tips below).
Water-based products can last 3-5 years if the can is unopened, in good condition and stored in correct temperatures.
Product that is 3 years old will not look like product that is 6 months to 1 year old. You will see more stratification or separation as the product ages. Settling is natural. Always stir thoroughly before using.
Foul Smell
If your product has a foul smell, it is contaminated and no longer in useable condition.
Clumps & Settling
Gravity can cause some solids to settle on the bottom of the can and slight separation on the top. This is normal. If working with older product stir with a paint mixing attachment on a drill.
If the solids dissolve and clumps smooth out after mixing from the bottom, the product is in good condition for use.
Inability to reincorporate large, chunky lumps after stirring for several minutes is an indication that the product has frozen and can no longer be used.
Storage Tips
See video tutorial: Tips on Storing Leftover Finishes
Water-based finishes crystalize and form a skin due to evaporation when the air-tight seal on a can is broken at first use. The following best practices will increase the life of your product:
- Pry open sealed lids with a paint can opener by hooking under the lid's rolled edge. The use of a screwdriver can disfigure the rim and lid, impairing a complete seal.
- Keep lid closed while working. Pour what you will use into a bowl, paper cup, or plate, and close can lid as you work.
- Clean the chime of the can thoroughly with a paper towel before closing to create a complete seal. Product falling into the chime can be minimized by using a pouring lid, such as Fitsall. Avoid wiping used brushes on the lid.
- Pound the lid in place using a rubber mallet to avoid distorting the chime or lid. Dents in the lid from direct contact with a hammer can impair a complete seal. Alternatively, place a flat piece of wood over can lid and firmly pound shut.
- Store in moderate temperatures. Avoid temperatures below 50°F/10°C or above 100°F/26°C. Keep from freezing. Frozen and heat-damaged product cannot be revitalized. Temperature-controlled spaces, such as a basement, are ideal for storage. Do not store product in an attic, garage, in direct sunlight, or next to something warm like a water heater or furnace.
- Store can upside down to create a liquid seal, minimize evaporation and reduce the chance of crystallization. Decant remaining product from the can before stirring.
- Decant leftovers to a smaller container when the finish is almost used up. Alternative storage containers for water-based products are plastic FIFO bottles or glass bottles. Do not fill metal-lidded containers completely to prevent them from rusting.
The following water-based product mixtures can be stored:
- Product thinned with up to 15% General Finishes Extender or General Finishes Accelerator can be stored, with the exception of thinned General Finishes Water Based Wood Stain.
- Mixtures involving colors & sheens within the same product line, such as:
- High Performance Satin + High Performance Gloss
- Snow White Milk Paint + Coastal Blue Milk Paint
- Amber Dye Stain + Merlot Dye Stain
The following product mixtures should NOT be stored:
- Any water based product with thinned tap water; water often contains bacteria that will adversely affect stored paint.
- Topcoat + Stain or Paint
- Milk Paint + Chalk Style Paint
- Water Based Wood Stain + Dye Stain
Creative Finishing Techniques Using Milk Paint
Layering Colors & Distressing
- Test colors on the underside of your project to ensure it is what you want.
- Stir the paint. If it is too thick, add a small amount of water to thin, then stir again.
- Apply 2 coats of base color using an acrylic bristle brush, poly foam brush, paint pad applicator, or sprayer with an HVLP 1.8 or 2.0 needle.
- Dy 2-4 hours between coats. Buff each coat with a fine-grade (220-320) foam sanding pad or 400-grit sandpaper.
- Apply 2 coats of top color. Dry 2-4 hours between coats, but no more than 4 hours; sanding is easier when the paint has had less time to tighten down. Buff each coat as before with a fine-grade (220-320) foam sanding pad or 400-grit sandpaper.
TIP: If you want more of the underlying color exposed, seal the base color with a coat of General Finishes High Performance Topcoat before painting the top color. This allows for easier sanding without burning all the way through to bare wood. - Using 120- to 150-grit sandpaper, sand through the top color to reveal the base color.
Chippy Farmhouse Technique
MATERIALS NEEDED:
- General Finishes Water Based Wood Stain: Espresso
- General Finishes Milk Paint: Snow White
- Water-Based Topcoat
- Assorted Foam & Chip Brushes
- Vaseline
- Paper Towels
STEPS:
- Stain raw wood with Espresso Water Based Wood Stain.
- Paint or dab Vaseline in random areas.
- Paint over Vaseline with Snow White Milk Paint. Let dry.
- Wipe back with a paper towel to reveal chipped areas (repeat with different colors for layered, aged effect).
- Seal with 3 coats of water based topcoat.
Creating Custom Colors
You can design your own custom glazes, stains, washes and varnishes with General Finishes intermixable water-based products. See tips and recipes below:
For the mixes listed below, General Finishes recommends the following two steps:
- Applying a base layer of High Performance Topcoat before applying your custom glaze.
- Protect all of these finishes with 2-3 coats of topcoat when you are finished.
Pastel Glaze/Whitewash:
MATERIALS NEEDED:
- General Finishes Milk Paint: Your choice of colors
- General Finishes Glaze Effects: Winter White OR General Finishes Water Based Wood Stain: Whitewash
Do not add more than 50% paint to the glaze or stain, or else there will be so much pigment it will be difficult to wipe away the finish.
Custom Glaze:
MATERIALS NEEDED:
- General Finishes Glaze Effects: Your choice of colors
SAMPLE MIX:
Pitch Black Glaze Effects + Winter White Glaze Effects.
Experiment with proportions and colors.
Custom Stain Colors:
MATERIALS NEEDED:
- General Finishes Milk Paint: Your choice of color
- General Finishes Glaze Effects: Clear Base OR General Finishes Pre-Stain Wood Conditioner Natural
SAMPLE MIXES:
- 1 part Milk Paint + 1 part Pre-Stain Natural [50:50 mix] OR
- 1 part Milk Paint + 1 part Glaze Effects Clear Base [50:50 mix] OR
- 1 part Milk Paint + 2 parts Water Based Wood Stain Natural [1:2 mix]
Proportions are relative to the color you are reducing. Some colors may require 2 parts Clear Base to reduce strength, others may require 1.
Begin with a 50:50 mix, and add more Clear Base as needed.
Increase your color palette by mixing 2 or 3 Milk Paint colors together before adding the Clear Base.
Furniture Care and Maintenance
Cure First
You have just finished applying a fine furniture finish. Treat gently until the paint or topcoat have fully cured. Allow 21 days for a water-based finish to cure and 30 days for an oil-based finish to cure before cleaning.
Regular Cleaning and Maintenance
- Remove dust with a water-dampened cloth. Dust can build up over time and may scratch or dull finishes if not removed regularly.
- Remove fingerprints, cooking fumes and smoking residue with mild soap and water. These contaminants will not harm the finish, but they accumulate on surfaces and dull the original luster.
- As with all fine furniture finishes, avoid using furniture polish, cleaners or dusting sprays that contain silicone, alcohol, ammonia and anything acidic. Exception: We have successfully cleaned with Clorox wipes for occasional cleanups.
- Clean up water, alcohol and food spills in a timely manner and use placemats & coasters to protect the finish.
- Future finishes or touch-ups may not adhere properly or perform as desired over a contaminated surface. Some contaminants, such as silicone, seep through finish into the wood and often cannot be removed.
- Avoid excessive exposure to direct sunlight, high temperatures or high humidity. These can damage furniture and finishes.
Warnings, Personal Protection & Warranties
Compatibility
Do not use water-based products with Linseed Oils or Danish Oils.
Limited Warranty
General Finishes products must be tested to your complete satisfaction before using. General Finishes will not be responsible for color satisfaction, misapplication, nor compatibility with other manufacturers' products. General Finishes will be responsible only for the cost of our products, and not for costs such as labor, damage or project replacement.
Contamination and Compatibility
Our finishes are engineered as a system and are compatible with each other. General Finishes cannot guarantee an ideal refinish when applying our products on top of or combined with another company's products or over surfaces that have been in contact with waxes, polishes or sprays containing contaminants such as silicone. Test for adherence and aesthetics before beginning.
Warning
If you scrape, sand, or remove old paint, you may release lead dust. LEAD IS TOXIC. EXPOSURE TO LEAD DUST CAN CAUSE SERIOUS ILLNESS, SUCH AS BRAIN DAMAGE, ESPECIALLY IN CHILDREN. PREGNANT WOMEN SHOULD ALSO AVOID EXPOSURE. Wear a NIOSH-approved respirator to control lead exposure. Clean up carefully with a HEPA vacuum and a wet mop. Before you start, find out how to protect yourself and your family by contacting the National Lead Information Hotline at 1-800-424-LEAD or log onto www.epa.gov/lead.
FIRST AID:
Seek immediate medical attention if symptoms occur due to the following. EYE CONTACT: Remove any contact lenses. Flush eyes with water for 20+ minutes while lifting upper and lower eyelids. SKIN CONTACT: Wash thoroughly after handling. INHALATION: Move to fresh air and loosen clothing. If not breathing, if breathing is irregular or if respiratory arrest occurs, provide artificial respiration or oxygen by trained personnel. INGESTION: Call physician immediately. Wash out mouth with water. Do not induce vomiting unless directed to do so by medical personnel. Never give anything by mouth to an unconscious person.
Warning
This product contains a chemical known to the State Of California to cause cancer and birth defects. Do not swallow; first aid: drink water to dilute product. May cause eye or skin irritation; first aid: flush eyes thoroughly with water.
Warning
Keep out of reach of children. Avoid contact with eyes. Keep container tightly closed when not in use. Wash thoroughly after handling.
PERSONAL PROTECTION DURING USE:
Hand protection
Chemical-resistant, impervious gloves complying with an approved standard should be worn when handling chemical products if a risk assessment indicates this is necessary. Considering the parameters specified by the glove manufacturer, check during use that the gloves still retain their protective properties. It should be noted that the time to breakthrough for any glove material may differ for different manufacturers. In the case of mixtures, consisting of several substances, the protection time of the gloves cannot be accurately estimated.
Eye protection: Safety eyewear complying with an approved standard should be used when a risk assessment indicates this is necessary to avoid exposure to liquid splashes, mists, gases, or dust. If contact is possible, the following protection should be worn unless the assessment indicates a higher degree of protection: safety glasses with side shields.
Respiratory protection:
Based on the hazard and potential for exposure, select a respirator that meets the appropriate standard or certification. Respirators must be used according to a respiratory protection program to ensure proper fitting, training, and other important use aspects.
Body protection Personal protective equipment for the body should be selected based on the amount and repetition of exposure. It should be approved by a specialist before handling this product.
Environmental exposure controls:
Emissions from ventilation or work process equipment should be checked to ensure they comply with the requirements of environmental protection legislation.
Appropriate engineering controls:
Good general ventilation should be sufficient to control worker exposure to airborne contaminants.
Hygiene measures:
Wash hands, forearms, and face thoroughly after handling chemical products, before eating, smoking, and using the lavatory, and at the end of the working period. Appropriate techniques should be used to remove potentially contaminated clothing. Wash contaminated clothing before reusing. Ensure that eyewash stations and safety showers are close to the workstation location.
Other skin protection: Appropriate footwear and any additional skin protection measures should be selected based on the task being performed.
Specifications
| Basic Features | |
|---|---|
| Product Colors | White, Clear |
| Base Type | Water |
| Ambering | No |
| Sheen | Flat |
| Interior or Exterior | Interior/Exterior |
| Type | Acrylic Paint |
| Application | |
| Coats | 1+ coats |
| Application Method | Brush, Roll, Spray |
| Brushable | Yes |
| Sprayable | Yes |
| Spray Tip Sizes | HVLP - 1.4-1.7mm |
| Dry Time | |
| Dry Time - Touch | 30+ min. |
| Dry Time - Recoat | 2+ hr |
| Dry Time - Light Use | 7-10 days |
| Dry Time - Cure | 21 days |
| Contents | |
| Can Sizes | Pints, Quarts |
| Can Size Exceptions |
Gallons only available in Antique White, Basil, Coastal Blue, Dark Chocolate, Driftwood, Lamp Black, Linen, Millstone, Queenstown Gray, Seagull Gray, Snow White, Tuscan Red. 5 Gallon Pails for Snow White, Lamp Black and Antique White only. |
| Coverage | 150 sq. ft/quart, 600 sq. ft/gal |
| Technical Data | |
| Viscosity | Thick |
| Viscosity (cPs) | 2000-3000 |
| Weight Solids | 54% |
| VOC | <93 g/L. Varies by color. See color-specific SDS for exact number. |

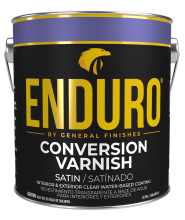 Enduro Water-Based Conversion Varnish
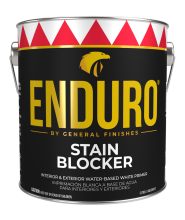 Enduro Water Based Stain Blocker Primer
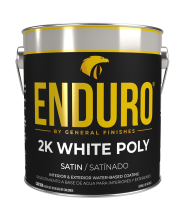 Enduro Water-Based Tintable 2K White Poly
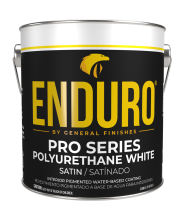 Enduro Water-Based Pro Series White Polyurethane
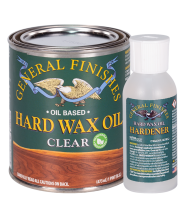 Hard Wax Oil & Hardener
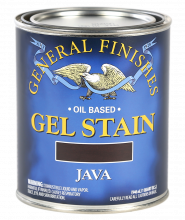 Gel Stains
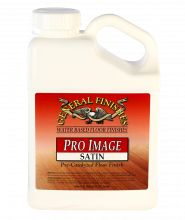 Pro Image Flooring Topcoat
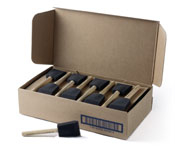 Jen Poly Brushes
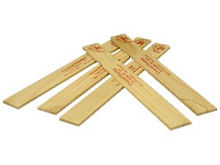 Stir Stix
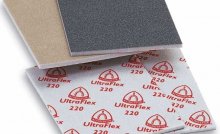 Ultraflex Softback Sanding Sponge
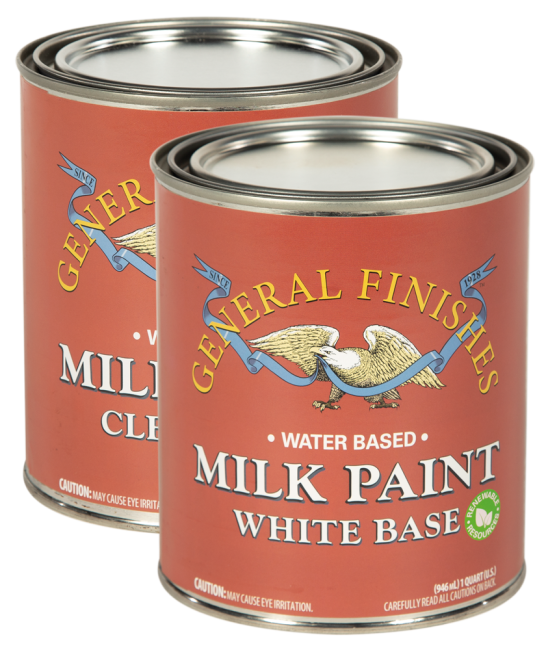
 SDS ENGLISH: Water Based Milk Paint: Clear Base - 2023-12
