 Enduro Water-Based Conversion Varnish
 Enduro Water Based Stain Blocker Primer
 Enduro Water-Based Tintable 2K White Poly
 Enduro Water-Based Pro Series White Polyurethane
 Hard Wax Oil & Hardener
 Gel Stains
 Pro Image Flooring Topcoat
 Jen Poly Brushes
 Stir Stix
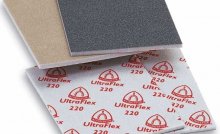 Ultraflex Softback Sanding Sponge
Hand Application of General Finishes Water Based Wood Stains
- Always stir the contents well. Stirring reduces the thickness of the stain and distributes pigments that may have settled to the bottom of the can.
- It is essential to apply a wet, liberal amount of stain with a foam brush or a latex paint pad applicator to ensure easy workability. If too little stain is used, the surface can dry too quickly causing an uneven appearance.
- Divide your project into manageable sections (top, side, drawer, door).
- Stain a complete section and wipe off the excess evenly with the grain using paper towels or a clean cloth. Check for missed spots and lap marks before moving to the next section. Immediately correct lap marks by rewetting the entire working area with stain and wiping the excess off.
- Sanding between coats of any stain or topcoat is referred to as Buffing. We do NOT recommend buffing between coats of stain because you may remove an area of stain that cannot be re-blended. If you must buff because you have imperfections that need to be smoothed out, do so with caution using a superfine sanding pad or #320 or #400 grit sandpaper. Do not buff prior to the first application topcoat.
- On most projects, three applications of topcoat is just right. On projects receiving extra wear such as table and desktops, additional coats will add more protection. Tip: use our High Performance Polyurethane for even more durability. For more instructions about applying Top Coats, click here.
Applying General Finishes Glazes
Glaze Effects are translucent water-based colors that may be used over any water-based stain or paint to create beautiful decorative finishes such as distressing, antiquing, burnishing, and color washing.


- Always test the color on the underside of the project. It is your responsibility to insure that the color is what you want. Do not practice on your new furniture!
- Always stir the contents well. Stirring distributes pigments that have settled to the bottom of the can.
- Option: Before applying glaze you have the option of top coating first, which will help you control the amount of color and facilitate the spreading of glaze over the surface. The Top Coat layer is smoother and less absorbent, allowing the glaze to slide across the surface. If you want a rustic look with more color, skip the Top Coat layer and apply the glaze directly to the paint. Start with two base coats of Milk Paint following application instructions shown above.
- Let the final base coat dry for 2-3 hours.
- Pour Glaze color into a paper plate covered with aluminum foil or painter's tray. Working one small section at a time, apply the Glaze liberally with a foam brush, synthetic brush, or paint pad over an entire section, keeping the surface wet with Glaze.
- Wipe off excess with absorbent wiping cloths or paper towels to achieve the desired look. Do not use Tee-shirts.
- If you want to rework a section, simply rewet the surface with Glaze.
- Work quickly, so that the Glaze color does not dry before finishing a section. If necessary, mask off smaller sections around raised areas such as beadboard and moldings. Glazes dry fairly quickly, so plan your sections before beginning.
- If working in high temperatures or low humidity, Glaze Effects may be thinned with 10-20% water or General Finishes Extender (3 to 6 oz. per quart) to improve open time for application.
- Let dry 2-4 hours. Apply water-based Top Coat for additional durability or to increase sheen.
Application of General Finishes Milk Paints
Do I Need A Primer?
- Although Milk Paints can be applied directly onto bare wood, the use of an additional coat of Milk Paint as a "primer" is recommended for heavily grained wood such as Oak, Pine or Parawood, especially with light colors.
- Most dark Milk Paint colors do not need a primer. If you want a smoother finish, just add a third coat.
- Hand Application of General Finishes Milk Paints
- Remove hardware from furniture. Taking a little extra time to remove backs of cabinets, drawer fronts etc. will make staining much easier. Milk Paints may be intermixed to create additional colors. Snow White or Antique White will soften darker colors.
- If working in high temperatures or low humidity, Milk Paints may be thinned with 10-20% water or General Finishes Extender (3 to 6 oz. per quart) to improve open time for application.
- If working over existing paint or finish, always test a small area to make sure paint will adhere. Sand glossy surfaces with #120 grit sandpaper before proceeding.
- Make disposable paint trays by covering paper plates with aluminum foil.
- Test the color on the underside of the project. It is your responsibility to ensure that the color is what you want.
- Always stir the contents well. Stirring distributes pigments that have settled to the bottom of the can.
- Paint on a wet, liberal coat with a wide foam brush, bristle brush, or paint pad applicator. If too little paint is used, the surface can dry too quickly causing an uneven appearance.
- Let dry 2 to 3 hours before applying another coat.
- We recommend two to three coats of paint. If the paint is not covering after 2 coats, you are not applying heavily enough. If using different colors of Milk Paint over one another (i.e.-when creating antique finishes) always apply a coat of Top Coat in between the colors to prevent color blending.
- Dry time is normally 2-3 hours under ideal conditions (70° and 70% humidity). Cooler temperatures or higher humidity will prolong dry time. Good ventilation, air movement, and higher temperatures will accelerate dry time.
- Sanding between coats of any stain, paint, or topcoat is referred to as Buffing. Buff between each coat of Milk Paint with a super fine sanding sponge, #320 or #400 grit sandpaper.
- Milk Paint dries with a low luster sheen. Although it can be used as a one-can finish, we recommend one application of Water Based Top Coat for increased durability or to increase sheen. It is not necessary to buff after applying the final Top Coat.
- Milk Paints are rated for exterior use and do not require a Top Coat when used in outdoor applications. General Finishes water-based Top Coats are not intended for exterior use.
Use Milk Paint for all your outdoor furniture. It is not just an interior product! Classic interior/exterior paints for use with furniture, crafts, and cabinets. Milk Paint is a sturdy outdoor finish perfect for outdoor furniture. Uniquely engineered from the latest paint technology, Milk Paints can be used directly from the can to produce a high-quality satin sheen. No mixing messy powders!
Application of General Finishes Water Based Top Coats
- If you are applying Water Based Top Coat over an oil-based stain, allow the oil stain to dry a minimum of 48 hours under ideal conditions.
- Water-based top Coats are milky white in the can but will dry to a crystal clear finish. Stir contents well to ensure that all the ingredients are mixed together.
- Apply with a foam brush, latex paint pad applicator, or by spraying.
- Apply Top Coats liberally using smooth even strokes working in the direction of the grain. Use enough material to provide a wet film. Do not over brush! Top Coats self-level beautifully.
- Top Coats have "burn in" characteristics and may slightly lift some of the color during the application of the first coat (particularly red colors).
- On most projects, three or four coats of Top Coat is just right. On projects receiving extra wear such as table and desktops, additional coats will add more protection. Tip: use our High Performance for even more durability.
Dry Time of Top Coats
- Dry time is normally 2-3 hours under ideal conditions (70 degrees F and 50% humidity).
- Cooler temperatures or higher humidity will prolong dry time to 8-10 hours.
- Good ventilation, air movement, and higher temperatures will accelerate dry time.
Buffing Top Coats
- Do not buff the stain prior to the first application top coat.
- It is important to buff in between each application of tocoat for the smoothest possible finish.
- After Top Coat has dried, buff between each application with a superfine sanding sponge.
- Remove dust with a clean cloth.
- It is not necessary to buff the final topcoat.
Warranty
General Finishes' products should be tested to your complete satisfaction before using. General Finishes will be responsible only for the cost of the product. General Finishes will not be responsible for any other costs such as labor costs, damage costs, or replacement costs.
How to Spray Water Based Finishes
General Finishes water-based products can be sprayed through compressed air, HVLP, airless or C.A.S. units. Surface Preparation: All surfaces should be clean and free from dirt and oil and sanded as per the instructions above.
Spray Application of General Finishes Water Based Finishes Using HVLP Spray Equipment
- Water-based High Performance is ready to spray from the container. If necessary in hot or dry climates, reduce 10 to 20% with water or General Finishes Extender to extend the open time.
- Pre Sealing: Soft woods such as Pine and Aspen absorb stain at an uneven rate and may respond better to staining if the wood has been pre-sealed. Natural stain can be applied to raw wood to condition the surface for uniform penetration of the stain. Pre-sealing will cause the final stain to be lighter. Always test your color on a hidden part of the furniture! Allow the Natural stain to dry 1 hour before applying your final stain color.
- If you are using a sprayer that has been used for oil-based or lacquers, clean the unit thoroughly and rinse with warm water before using. Apply a thin coat first that will dry and harden faster. Sand this first coat down to a smooth base on which to build your finish coats. With water-based finishes, it is better to spray 2 thin coats rather than 1 heavy coat.
- Recommended Spray Tips for Wood Stains and Top Coats. Fluid tip sizes should be as follows: Compressed air - .040, HVLP - .051, Airless - .009. Recommended Tips for Milk Paint. Compressed air - .050, HVLP - .072, Airless - .013. Air caps should be medium size. Contact your supplier to verify proper tip sizes for your specific equipment.
- Always strain material through a medium to fine mesh filter before spraying.
- Spray medium wet films at 3-5 wet ml thickness.
- Reduction: If spraying the product as a stain in order to allow the grain to show through, reduce 10 to 20% with water or General Finishes Extender. If spraying as a paint, do not reduce. For example, you may wish to spray Cranberry Red stain on for a painted look. In this instance, do not reduce. It is generally not necessary to reduce Milk Paints. but they also may be reduced 10 to 20% with water or GF Extender.
- Practice makes perfect! If you have never sprayed finishes before, take a large piece of cardboard and practice your technique first. Spray water on the cardboard to learn how the gun works. Check your fluid settings and adjust the controls to get comfortable with the spray angles and to develop your technique.
- Keep your gun at a 90* angle, 6-8" from the surface. On large flat areas, use wet, even patterns 6 to 8? wide. Overlap each pass 25% to conceal lines.
- For narrow surfaces, reduce the fan pattern to 2-3" to reduce overspray. Break your work into sections such as dresser top or drawer fronts. Spraying too large of an area can result in a textured grainy surface. A correctly sprayed finish should appear even and glossy. It is important to spray enough material to allow proper flow and leveling of the finish.