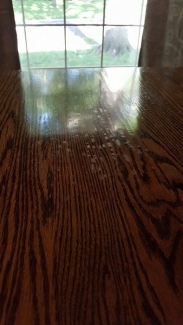

Although some companies promote their products as "no prep", that is nonsense. If you skip this step the finish can fail.
General Finishes standard for a good finish is it must adhere well and stand the test of time.
1. PREP CLEANING:
Cleaning an existing finish removes dirt, grime and many common contaminants such as oil from hands. Dirt, grime, and oil prevent good adhesion causing the possibility of chipping, peeling and flaking - all signs of a failed finish.
Although some companies promote their products as "no prep," that is nonsense. If you skip this step the finish can fail. General Finishes's standard for a good finish is it must adhere well and stand the test of time.
The most critical part of finishing a piece of furniture happens before you open a can of stain or paint - it starts with the sanding. Sanding is critical to creating a smooth surface. Use the following sanding sequences for new wood:
For wood that is going to be painted, use 120-grit, followed by 150-grit.
Our recommendation to fix white cabinets that have yellowed is to do a thorough sanding and precleaning and recoat with the following products:

The problem areas on your table are probably caused by surface contamination from oils, waxes or cleaning products used over the years.
Contaminants from dusting sprays that contain silicone will also impact the appearance and adherence of a finish - silicone is almost impossible to remove. Oil soaps and wax can also cause adhesion failures. This may be why the finish is performing differently on the leaves vs the table top. Adhesion failure is often more obvious in the deepest patterns of grain because the contamination is driven deep into the grain.
Wood finishing is fun and easy. Don't rush through finishing a piece of furniture as if it is a race. Imagine how it will look finished in your home in living color. Set up a good prep area. Turn on some tunes. Get creative and enjoy the journey.
This response is true of prepping and existing finish on furniture, but kitchen cabinets are more problematic because they are work areas where grease, steam, food splatters and oil from hands are common. Prep is basically degreasing and abrading the surface for better adhesion. Oil or substances on hands really show up on a failed re-finish around doorknobs and hands if the surface is not cleaned thoroughly.
There are several reasons:
1. The cabinets were not prep cleaned and sanded properly. Sanding and cleaning are an essential part of any refinishing process.
In most cases, you can use a 220 sanding pad to scuff the surface and clean with a 50|50 mix of water and denatured alcohol.
John Mosconi of Sting King Lutherie in Akron, Ohio takes us on his journey of refinishing this mandola.
Step 1: Prep and Sealing