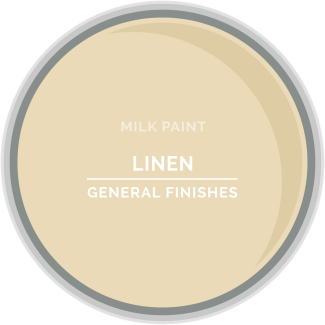
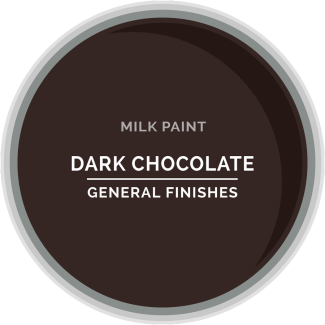
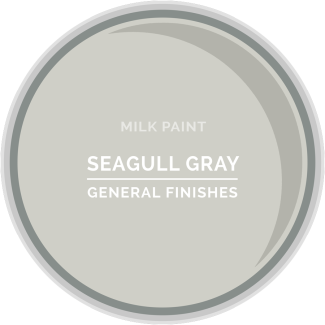
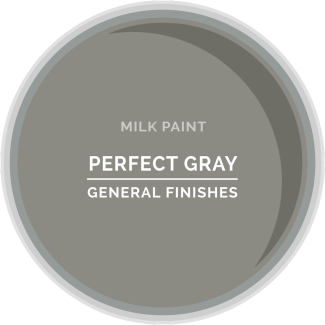
Milk Paint for Cabinets & Furniture: Water Based

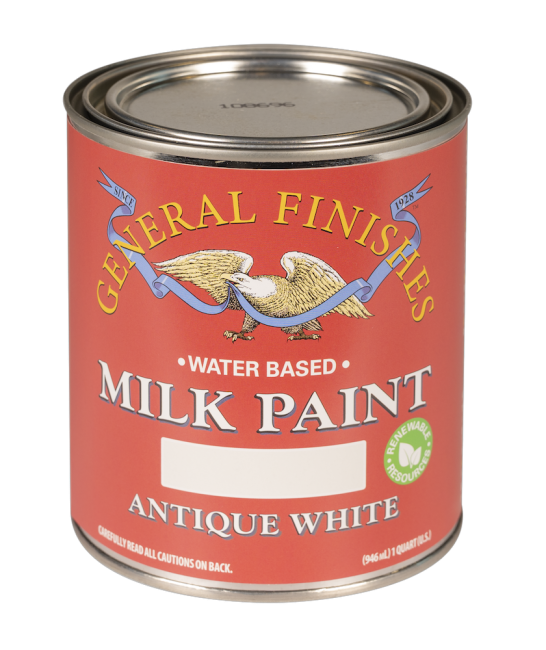
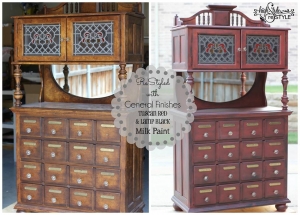
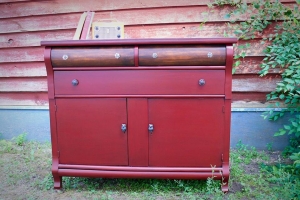
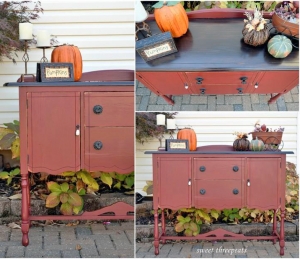
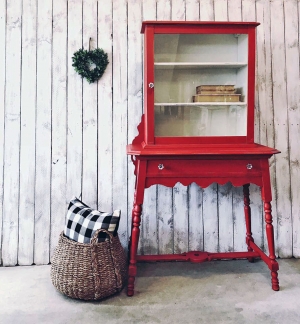
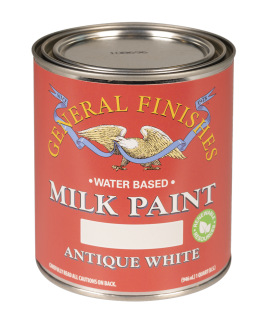
General Finishes Milk Paint is a premium low VOC, self-sealing interior/exterior mineral-based paint named for its low-luster sheen. So durable, it is a go-to finish for cabinets and furniture. It is now more environmentally friendly than ever, made with more than 50% RENEWABLE RESOURCES formulated from sustainable materials that decrease the carbon footprint. It can be brushed, rolled, or sprayed. See our spray tip size recommendations here. Need inspiration? Visit the General Finishes Design Center or the GF Pinterest Board.

Watch the Milk Paint product overview video Here

Instructions

Step 1: Preparation for Paint

Before applying paint, all raw wood projects require preparation sanding, and all existing finishes require prep cleaning and sanding. If you skip this critical step, your finish may fail.

Preparation for Raw Wood Projects
See our video: How to Prep Sand Raw Wood

  1. Sanding schedule: 120-grit sandpaper followed by 150-grit. Do not over-sand with fine-grit sandpapers; this will close and seal the wood grain, preventing ideal color absorption. Do not use steel wool with water-based finishes; the particles will get trapped in the finish and rust.
  2. Remove dust with a vacuum, compressed air, an oil-free tack cloth or a water-dampened rag.
  3. Let dry completely before applying General Finishes product.

Preparation for Sealed Surface Projects
For high-use areas with heavy grime build-up and oil from hands, give your project a deeper cleaning.
See our video: How to Prepare Existing Finishes

  1. Scuff clean with a Scotch Brite™ pad or maroon synthetic steel wool and a 50:50 mix of denatured alcohol and water. Dry 1-2 hours. Avoid cleaning with products containing phosphates (salt), which can linger in the substrate and produce a white haze. If your project requires a deeper cleaning, see Power Prep Cleaning Highly Used Existing Finishes below.
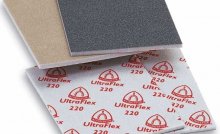
  2. Sand lightly with a fine-grade (220-320) foam sanding sponge or 400-grit sandpaper.
  3. Remove dust with a vacuum, compressed air, an oil-free tack cloth or a water-dampened rag.
  4. Let dry completely before applying General Finishes product.

Power Prep Cleaning Highly Used Existing Finishes
See our video: How to Power Prep Existing High Use Finishes for Stain or Paint

  1. Scrub clean with a detergent, such as Spic and Span or Dawn, using a Scotch Brite™ pad.
  2. Rinse well with water.
  3. Scrub clean with a Scotch Brite™ pad and a 50:50 mix of denatured alcohol and water. Dry 1-2 hours.
  4. Sand lightly with a fine-grade (220-320) foam sanding pad.
  5. Remove dust with a vacuum, compressed air, an oil-free tack cloth or a water-dampened rag.
  6. Let dry completely before applying General Finishes product.

Alternative Cleaning Solutions For Existing Finishes (Not as aggressive or effective as denatured alcohol; requires rinsing.) 

  1. 50:50 mix of bleach and water 
  2. 50:50 mix of vinegar and water
  3. Mineral spirits can be used when working with water-based products, but only if the surface is thoroughly rinsed and allowed to dry for 72 hours.

 

Step 2: Priming

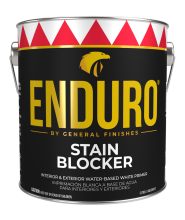
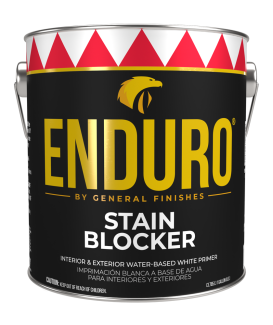
A base coat of primer is not required to use General Finishes Milk Paint. However, 2 coats of General Finishes Stain Blocker may be necessary in the following circumstances, especially when using WHITE OR LIGHT-COLORED PAINTS. 

Watch Stain Blocker Product Overview video Here

  1. RAW WOOD: Before using white & light-colored paints, apply 2 coats of GF Stain Blocker or GF White UndercoatRaw Wood Tannin Bleed-Through is unpredictable; yellowing can appear immediately or months later with seasonal temperature changes. Oak, pine, mahogany and douglas fir are particularly prone to bleed-through. 
  2. SEALED SURFACEBefore using white & light-colored paints, apply 2 coats of GF Stain BlockerSealed Surface Bleed-Through may be caused by previous stains or aniline dyes, surface contamination, and incompatibility between brands.
  3. Knots in Wood contain rosin (sap) and are dense, making paint adhesion a challenge. Pine knots are especially difficult to cover with white or light paints. If you decide to paint over them, apply 3 coats of Stain Blocker over the areas with knots first; however, we cannot guarantee against rosin bleed-through. You are better off using a dark paint on pine.
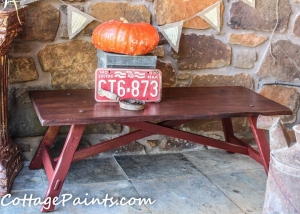
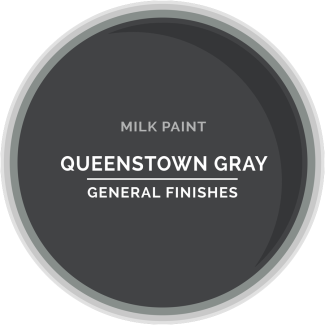
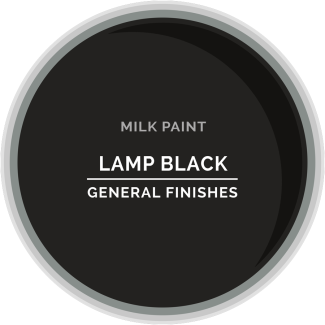
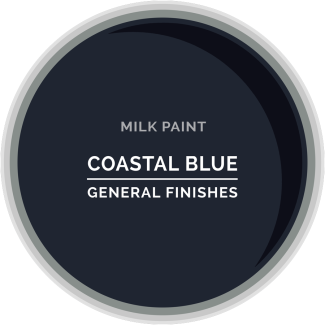
  4. Dark Paint Colors Over Sealed Surfaces: To improve coverage when applying darker colors such as Coastal Blue, Dark Chocolate, or Queenstown Gray, prime with a coat of Lamp Black. 
  5. Non-Wood Surfaces may be able to take paint if primed first. Primer may improve adhesion over laminate and prevent bleed-through from MDF. Metal requires a primer made specifically for metal.

NOTE: Do not tint Stain Blocker or use Stain Blocker on projects that will be stored outdoors.

Priming Non-Wood Surfaces for Paint
Always test for adhesion on a hidden area of your project before getting started.

Metal: General Finishes Milk Paint is engineered for wood surfaces, but may adhere to metal, such as aluminum or steel, if a metal primer is applied first. 

  1. Clean surface well.
  2. Apply primer.
  3. Dry 48-72 hours before painting.

Laminate: Milk Paint MAY adhere to laminate with a bonding primer; however, we cannot guarantee it. You may increase your chances of success by abrading the surface.

  1. Prep: Deep clean, dry thoroughly, sand with 150- then 180-grit sandpaper and wipe off dust.
  2. Prime: Apply bonding primer, dry 12+ hours before painting.

MDF: Milk Paint can be applied directly to MDF, but the MDF may cast a brown color if not primed first. Two base coats of white-pigmented shellac-based stain-blocking primer, or Stain Blocker, may prevent bleed-through. Alternatively, one base coat of General Finishes Seagull Gray Milk Paint may block brown tone caused by MDF.

MDF is not as absorbent as natural wood. Let each coat of primer and paint dry at least 48 hours before re-coating.

Fiberglass: Milk Paint can be applied directly over fiberglass without primer. We do not recommend applying other General Finishes products over fiberglass. Gel Stain may adhere to fiberglass, but it is not an exterior rated product. 

Disclaimer
Although Stain Blocker is engineered to prevent the most persistent bleed-through when two coats are applied, General Finishes cannot guarantee prevention of bleed-through or yellowing on every project. Unknown factors and assiduous bleed-through can impact results. Stain Blocker is the strongest option we are aware of at this time and has performed extremely well in our tests.

Step 3: How To Apply General Finishes Milk Paint

CAUTION: Do NOT use any type of clear topcoat over white or light GF Milk Paint Colors, as it may cause yellowing when used over wood substrates. GF Milk Paint is a premium self-sealing finish and does not require a topcoat. If you want a white paint with a higher sheen, use GF White Poly (spray only) or GF Brushable White Enamel instead. Darker colors can be top-coated if a higher sheen is desired.

Watch our Milk Paint Product Overview Video Here

Watch our How To Achieve A Bright White Finish Here

General Finishes Milk Paint Application Steps
Substrate: Wood (See below for other substrates)

  1. Watch product overview video here. 2:18 minutes.
  2. Work in a well-ventilated area. 
  3. Stir paint to reincorporate solids that have settled to the bottom of the can before and throughout the application process.
  4. Thin as desired with distilled water; start with 5%, adding up to 10% by volume. Do not use flowing agents such as Floetrol. This paint already contains a flow agent and outside products may not be compatible.
  5. Increase open time, if needed, with up to 10-15% General Finishes Extender if allowed by local regulations. GF Extender will improve flow and leveling and increase open time, which is helpful in dry climates. California Residents: Adding more than 2% of GF Extender will make the products non-compliant per SCAQMD Regulations. GF assumes no liability for the improper use of these products.    
  6. Apply as many coats as needed for desired coverage. 2-3 coats are standard but additional coats may be required when using colors with less "hide properties," such as bright reds, greens, yellows and whites.
    • Hand application: Using a synthetic bristle brush, foam brush, pad applicator, or microfiber roller such as Whizz or AllPro brand, apply using smooth, even strokes.
    • Spray application: See video tutorial on spraying Milk Paint. Before spraying, strain paint through a medium-mesh filter. Spray wet films at 3-5-mil thickness. HVLP: 1.8mm-2.0mm spray tip, medium air cap. Verify tip sizes with your equipment supplier. See our spray tip size recommendations here. Keep your gun at a 90° angle, 6-8" from the surface. On large, flat areas, use wet, even patterns 6-8" wide. For narrow surfaces, reduce the fan pattern to 2-3" wide to reduce overspray. Overlap each pass 25% to conceal lines. Wear full filter NIOSH/MSHA-approved respiratory & eye protection. Read here for more information on spraying techniques.
    • Face frames on cabinets: Milk Paint can be applied successfully to cabinet face frames, edges or drawer fronts with a brush, pad or small cabinet-specific roller such as Whizz or AllPro brand.
  7. Dry 2+ hours between coats and before General Finishes water-based topcoat in ideal conditions: 70°F/20°C; 50% humidity. Be sure to allow adequate dry time. You can tell if a water-based finish is dry if it forms a powder when lightly sanded with a fine-grade (220-320) foam sanding pad. If in doubt, wait longer. Rushing dry time can cause clouding/blush in topcoat due to moisture trapped between coats. Increase dry time if: 
    • Humidity is over 80%
    • 3+ coats are applied
    • Thick coats are applied
    • Applying over an existing sealed finish
    • Applying over products from other brands
    • Layering General Finishes water- and oil-based products:
      • Water over oil: Let oil-based products dry 72+hrs before applying water-based products
      • Oil over water: Let water-based products dry 24+hrs before applying oil-based products
    • To accelerate dry time in humid conditions, add General Finishes Accelerator and work in a space with good ventilation and air movement. If you decide to re-coat before the recommended time, test dryness. 
  8. Finish sand between coats with a fine-grade (220-320) foam sanding sponge or 400-grit sandpaper to improve smoothness and adhesion. Do not use conventional steel wool.
  9. Remove dust with a vacuum, compressed air, an oil-free tack cloth or a water-dampened rag.
  10. Topcoat is not required but is recommended in certain situations. See "Step 4: Topcoat over Milk Paint" below.
     

Cure Time
Water-based finishes cure and harden for full use after 21 days in ideal conditions. Avoid placing heavy objects on surfaces that have not completely cured. Treat gently, and do not clean with commercial products during the curing period.

Notes on Color

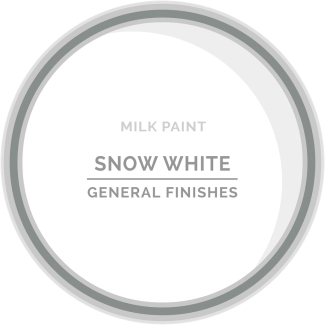
  • All white paints darken or yellow over time, but the change is more evident with bright whites, such as General Finishes Snow White Milk Paint. 
  • Some colors made in a clear base require additional coats for coverage due to their lower hide quality, e.g., reds, deep blues and yellows. Bright whites may require additional coats over dark existing finishes.

Warning: Do not use water-based products with Linseed Oils or Danish Oils.

Substrates: 
The above instructions are for application over wood surfaces only.
Non-wood substrates require different application techniques and dry times. See website FAQs for more information.

With the proper application technique, Milk Paint can adhere well to:

  • PVC
  • Fiberglass
  • MDF
  • Wood

Step 4: Topcoat over Milk Paint

CAUTION: Do NOT use any clear coat over white or light paints such as GF Milk Paint, or GF White Poly as it may cause yellowing. Any clear coat can become reactive over wood substrates, and turn slightly yellow. All of GF's White Paints are self-sealing with high durability and superior water and chemical resistance and do not require a topcoat. If you want a white paint with a higher sheen, use GF White Poly or GF Brushable White Enamel instead.

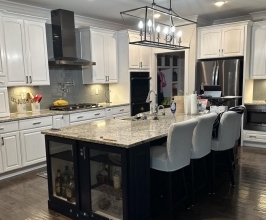
However, you can topcoat darker colors in high-use surfaces, such as kitchen cabinets or tabletops, with 3 coats of topcoat if you want to increase sheen. Glossier sheens will boost durability and make the surface easier to clean.

Recommendations
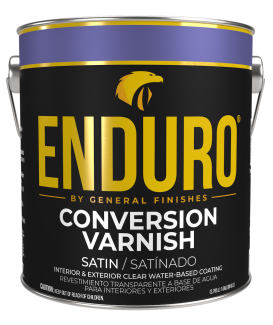
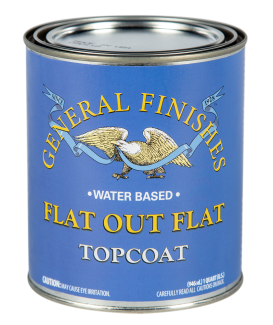
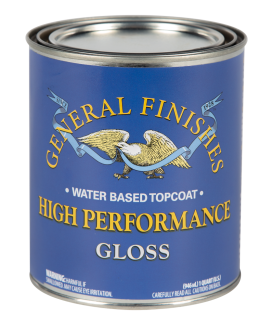
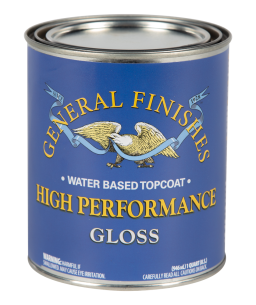
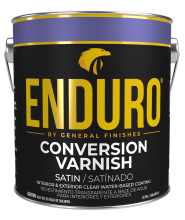
General Finishes High Performance Topcoat and General Finishes Enduro Clear Poly dry crystal-clear and are great for darker colors for high-use surfaces. General Finishes Flat Out Flat is our flattest topcoat, only suitable for projects that do not receive major wear.

Topcoating General Finishes Snow White Milk Paint
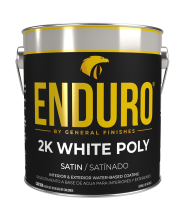
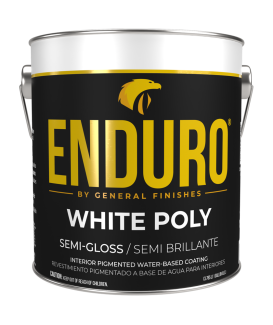
Clear, water-based finishes can react with wood substrates and previous finishes, causing the topcoat to yellow. This is most evident when using bright white paints. To avoid potential yellowing, use 3 coats of spray-only Enduro White Poly as a standalone finish. See our FAQ: How Do I Prevent Water Based Topcoat or Light Colored Paint from Yellowing?

Creative Finishing Techniques Using Milk Paint

Layering Colors & Distressing

  1. Test colors on the underside of your project to ensure it is what you want.
  2. Stir the paint. If it is too thick, add a small amount of water to thin, then stir again.
  3. Apply 2 coats of base color using an acrylic bristle brush, poly foam brush, paint pad applicator, or sprayer with an HVLP 1.8 or 2.0 needle.
  4. Dy 2-4 hours between coats. Buff each coat with a fine-grade (220-320) foam sanding pad or 400-grit sandpaper.
  5. Apply 2 coats of top color. Dry 2-4 hours between coats, but no more than 4 hours; sanding is easier when the paint has had less time to tighten down. Buff each coat as before with a fine-grade (220-320) foam sanding pad or 400-grit sandpaper.
    TIP: If you want more of the underlying color exposed, seal the base color with a coat of General Finishes High Performance Topcoat before painting the top color. This allows for easier sanding without burning all the way through to bare wood.
  6. Using 120- to 150-grit sandpaper, sand through the top color to reveal the base color.

Chippy Farmhouse Technique

MATERIALS NEEDED:

STEPS:

  1. Stain raw wood with Espresso Water Based Wood Stain.
  2. Paint or dab Vaseline in random areas.
  3. Paint over Vaseline with Snow White Milk Paint. Let dry.
  4. Wipe back with a paper towel to reveal chipped areas (repeat with different colors for layered, aged effect).
  5. Seal with 3 coats of water based topcoat.

Creating Custom Colors

You can design your own custom glazes, stains, washes and varnishes with General Finishes intermixable water-based products. See tips and recipes below:

For the mixes listed below, General Finishes recommends the following two steps:

  1. Applying a base layer of High Performance Topcoat before applying your custom glaze.
  2. Protect all of these finishes with 2-3 coats of topcoat when you are finished.

Pastel Glaze/Whitewash:

MATERIALS NEEDED:

Do not add more than 50% paint to the glaze or stain, or else there will be so much pigment it will be difficult to wipe away the finish.

Custom Glaze:

MATERIALS NEEDED:

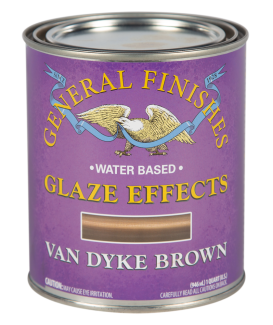
  • General Finishes Glaze Effects: Your choice of colors

SAMPLE MIX:

Pitch Black Glaze Effects + Winter White Glaze Effects.

Experiment with proportions and colors.

Custom Stain Colors:

MATERIALS NEEDED:

SAMPLE MIXES:

  1. 1 part Milk Paint + 1 part Pre-Stain Natural [50:50 mix] OR
  2. 1 part Milk Paint + 1 part Glaze Effects Clear Base [50:50 mix] OR
  3. 1 part Milk Paint +  2 parts Water Based Wood Stain Natural [1:2 mix]

Proportions are relative to the color you are reducing. Some colors may require 2 parts Clear Base to reduce strength, others may require 1.

Begin with a 50:50 mix, and add more Clear Base as needed.

Increase your color palette by mixing 2 or 3 Milk Paint colors together before adding the Clear Base.

Milk Paint & Glaze Effects Samples

Cleanup of Water Based Products

Application tools and materials containing water-based products can be cleaned with soap and water or General Finishes Brush & Gun Cleaner immediately after use.

Product Spills

Spills may be able to be removed from fabric and carpet if cleaned immediately with soap and water.

Disposal

Discard unused product and waste in an environmentally safe manner; check with local fire and health regulation. 

Storage of Water Based Products

Life of Product

General Finishes products do not last forever, even when unopened. They are best used within 1 year. The life of the product may be extended with proper can closure and storage conditions. (see Storage Tips below).

Water-based products can last 3-5 years if the can is unopened, in good condition and stored in correct temperatures.

Product that is 3 years old will not look like product that is 6 months to 1 year old. You will see more stratification or separation as the product ages. Always stir thoroughly before using.

Foul Smell

If your product has a foul smell, it is contaminated and no longer in useable condition.

Clumps & Settling

Gravity can cause some solids to settle on the bottom of the can and slight separation on the top. This is normal. If working with older product stir with a paint mixing attachment on a drill.

If the solids dissolve and clumps smooth out after mixing from the bottom, the product is in good condition for use.

Inability to reincorporate large, chunky lumps after stirring for several minutes is an indication that the product has frozen and can no longer be used.

Storage Tips

See video tutorial: Tips on Storing Leftover Finishes
Water-based finishes crystalize and form a skin due to evaporation when the air-tight seal on a can is broken at first use. The following best practices will increase the life of your product:

  1. Pry open sealed lids with a paint can opener by hooking under the lid's rolled edge. The use of a screwdriver can disfigure the rim and lid, impairing a complete seal. 
  2. Keep lid closed while working. Pour what you will use into a bowl, paper cup, or plate, and close can lid as you work.
  3. Clean the chime of the can thoroughly with a paper towel before closing to create a complete seal. Product falling into the chime can be minimized by using a pouring lid, such as Fitsall. Avoid wiping used brushes on the lid.
  4. Pound the lid in place using a rubber mallet to avoid distorting the chime or lid. Dents in the lid from direct contact with a hammer can impair a complete seal. Alternatively, place a flat piece of wood over can lid and firmly pound shut.
  5. Store in moderate temperatures. Avoid temperatures below 50°F/10°C or above 100°F/26°C. Keep from freezing. Frozen and heat-damaged product cannot be revitalized. Temperature-controlled spaces, such as a basement, are ideal for storage. Do not store product in an attic, garage, in direct sunlight, or next to something warm like a water heater or furnace.
  6. Store can upside down to create a liquid seal, minimize evaporation and reduce the chance of crystallization. Decant remaining product from the can before stirring. 
  7. Decant leftovers to a smaller container when the finish is almost used up. Alternative storage containers for water-based products are plastic FIFO bottles or glass bottles. Do not fill metal-lidded containers completely to prevent them from rusting.

The following water-based product mixtures can be stored:

  1. Product thinned with up to 15% General Finishes Extender or General Finishes Accelerator can be stored, with the exception of thinned General Finishes Water Based Wood Stain.
  2. Mixtures involving colors & sheens within the same product line, such as:
    • High Performance Satin + High Performance Gloss
    • Snow White Milk Paint + Coastal Blue Milk Paint
    • Amber Dye Stain + Merlot Dye Stain

The following product mixtures should NOT be stored:

  • Any water based product with thinned tap water; water often contains bacteria that will adversely affect stored paint.
  • Topcoat + Stain or Paint
  • Milk Paint + Chalk Style Paint
  • Water Based Wood Stain + Dye Stain

Furniture Care and Maintenance

Cure First

You have just finished applying a fine furniture finish. Treat gently until the paint or topcoat have fully cured. Allow 21 days for a water-based finish to cure and 30 days for an oil-based finish to cure before cleaning.

Regular Cleaning and Maintenance
  • Remove dust with a water-dampened cloth. Dust can build up over time and may scratch or dull finishes if not removed regularly. 
  • Remove fingerprints, cooking fumes and smoking residue with mild soap and water. These contaminants will not harm the finish, but they accumulate on surfaces and dull the original luster. 
  • As with all fine furniture finishes, avoid using furniture polish, cleaners or dusting sprays that contain silicone, alcohol, ammonia and anything acidic. Exception: We have successfully cleaned with Clorox wipes for occasional cleanups.
  • Clean up water, alcohol and food spills in a timely manner and use placemats & coasters to protect the finish.
  • Future finishes or touch-ups may not adhere properly or perform as desired over a contaminated surface. Some contaminants, such as silicone, seep through finish into the wood and often cannot be removed.
  • Avoid excessive exposure to direct sunlight, high temperatures or high humidity. These can damage furniture and finishes.

Warnings and Warranties

Milk Paint Warnings and Warranties


Compatibility 
Do not use water-based products with Linseed Oils or Danish Oils.


Limited Warranty
General Finishes products must be tested to your complete satisfaction before using. General Finishes will not be responsible for color satisfaction, misapplication, nor compatibility with other manufacturer's products. General Finishes will be responsible only for the cost of our products, and not for costs such as labor, damage or project replacement.


Contamination and Compatibility
Our finishes are engineered as a system and are compatible with each other. General Finishes cannot guarantee an ideal refinish when applying our products on top of or combined with another company's products or over surfaces that have been in contact with waxes, polishes or sprays containing contaminants such as silicone. Test for adherence and aesthetics before beginning.


FIRST AID: Seek immediate medical attention if symptoms occur due to the following. EYE CONTACT: Remove any contact lenses. Flush eyes with water for 20+ minutes while lifting upper and lower eyelids. SKIN CONTACT: Wash thoroughly after handling. INHALATION: Move to fresh air and loosen clothing. If not breathing, if breathing is irregular or if respiratory arrest occurs, provide artificial respiration or oxygen by trained personnel. INGESTION: Call physician immediately. Wash out mouth with water. Do not induce vomiting unless directed to do so by medical personnel. Never give anything by mouth to an unconscious person.


Prop 65 WARNING:
Warnings vary by color. See product label and SDS sheets for more information.

  • Alabaster, Key West Blue, Patina Green, Snow White, Westminster Green:
    WARNING: This product can expose you to chemicals including Titanium dioxide, Crystalline silica, respirable powder, which are known to the State of California to cause cancer. For more information go to www.P65Warnings. ca.gov. 
     
  • Antique White, Ballet Pink, Driftwood, Halcyon Blue, Harvest Yellow, Linen, Millstone, Persian Blue, Reverent Gray, Seagull Gray:
    WARNING: This product can expose you to chemicals including Titanium dioxide, Crystalline silica, respirable powder, Carbon black, respirable powder, which are known to the State of California to cause cancer. For more information go to www.P65Warnings.ca.gov.
     
  • Basil, Queenstown Gray:
    WARNING: This product can expose you to chemicals including Crystalline silica, respirable powder, Carbon black, respirable powder, Titanium dioxide, which are known to the State of California to cause cancer. For more information go to www.P65Warnings.ca.gov.
     
  • Blue Moon, China Blue, Empire Gray, Gulf Stream Blue, Perfect Gray:
    WARNING: This product can expose you to chemicals including Titanium dioxide, Carbon black, respirable powder, Crystalline silica, respirable powder, which are known to the State of California to cause cancer. For more information go to www.P65Warnings.ca.gov
     
  • Coastal Blue:
    WARNING: This product can expose you to chemicals including Crystalline silica, respirable powder, Titanium dioxide, Carbon black, respirable powder, which are known to the State of California to cause cancer. For more information go to www.P65Warnings.ca.gov.
     
  • Coral Crush, Klein Blue, Persimmon, Sunglow:
    WARNING: This product can expose you to chemicals including Crystalline silica, respirable powder, Titanium dioxide, which are known to the State of California to cause cancer. For more information go to www.P65Warnings.ca.gov.
     
  • Dark Chocolate:
    WARNING: This product can expose you to chemicals including Crystalline silica, respirable powder, Carbon black, respirable powder, which are known to the State of California to cause cancer. For more information go to www.P65Warnings.ca.gov.
     
  • Emerald, Holiday Red:
    WARNING: This product can expose you to Crystalline silica, respirable powder, which is known to the State of California to cause cancer. For more information go to www.P65Warnings.ca.gov.
     
  • Lamp Black, Tuscan Red:
    WARNING: This product can expose you to chemicals including Crystalline silica, respirable powder, Carbon black, respirable powder, which are known to the State of California to cause cancer. For more information go to www. P65Warnings.ca.gov.
     
  • Twilight:
    WARNING: This product can expose you to chemicals including Carbon black, respirable powder, Titanium dioxide, Crystalline silica, respirable powder, which are known to the State of California to cause cancer. For more information go to www.P65Warnings.ca.gov


WARNING: Keep out of reach of children. Keep container tightly closed until ready for use.

Specifications

Basic Features
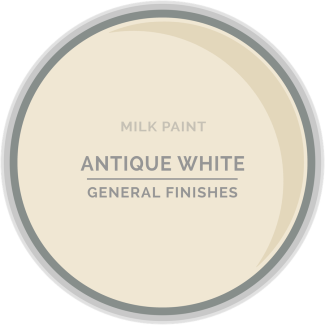
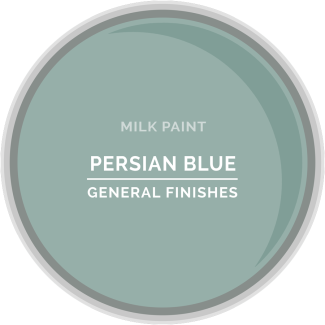
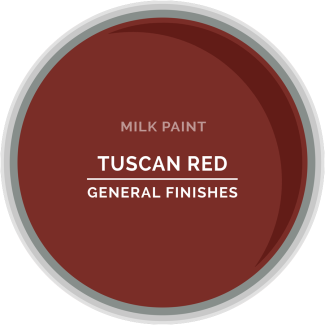
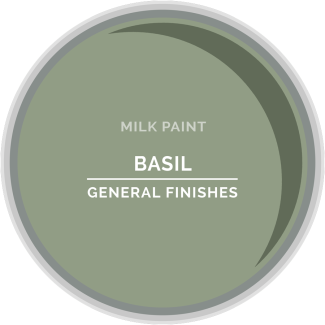
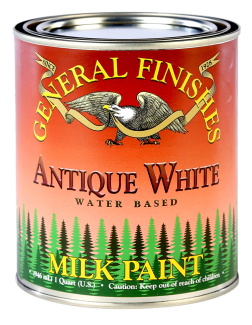
Product Colors Antique White, Basil, Coastal Blue, Dark Chocolate, Lamp Black, Linen, Perfect Gray, Persian Blue, Queenstown Gray, Seagull Gray, Snow White, Tuscan Red
Base Type Water
Sheen Flat low luster (10-15)
Interior or Exterior Interior/Exterior
Type Acrylic Paint
Application
Coats 1+ coats
Application Method Brush, Roll, Spray, Pad
Brushable Yes
Usable over existing finishes Yes
Sprayable Yes
Spray Tip Sizes HVLP 1.8mm-2.0mm
Topcoat Required Self-Sealing
Dry Time
Dry Time - Touch 30+ min.
Dry Time - Recoat 2+ hr
Dry Time - Light Use 7-10 days
Dry Time - Cure 21 days
Contents
Can Sizes Pints, Quarts, Gallons, 5 Gallon pails
Can Size Exceptions

THE FOLLOWING COLORS ARE AVAILABLE IN GALLONS: Antique White, Basil, Coastal Blue, Dark Chocolate, Driftwood, Lamp Black, Linen, Perfect Gray, Queenstown Gray, Seagull Gray, Snow White, Tuscan Red.

THE FOLLOWING COLORS ARE AVAILABLE IN 5-GALLON PAILS: Snow White, Lamp Black and Antique White.

Coverage 50-65 sq.ft./pint, 100-125 sq.ft./quart, 400-500 sq.ft./gallon
Technical Data
Viscosity Thick
Viscosity (cPs) 2000-3000
Weight Solids 54%
VOC US VOC
<50 g/L
Varies by color. See color-specific SDS for exact number.
Durability
Durability (Highest, High, Medium, Low) High
Hardness (Koenig #) 18
Chemical (105 max) 60

Design Center

FAQs

Milk Paint Frequently Asked Questions

*Can Gel Stain Be Used Over Laminate?

GF advises extra care and prep when applying any finish over laminate surfaces because they are specifically designed not to mar and therefore they are not very "sand-able", making adherence difficult.

In addition to this non-permeable surface factor, General Finishes Gel Stain is an oil-based product, and it is more difficult to obtain proper drying characteristics over a dense manufactured surface such as laminate. Gel stains, as all wood stains, were formulated to go over raw wood which has an "open" surface and can absorb some of the stain.

Customers have reported the successful use of Gel products over laminate surfaces. Here are two techniques:

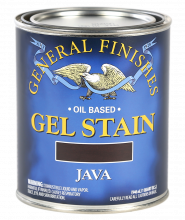
  1. Using Dark Chocolate Milk Paint as a Base under Gel Stain (Dark Chocolate Milk Paint was formulated to mimic the color of Java Gel Stain)
  2. Several techniques using only Gel Stain/no paint or primer

SOME NOTES:

  • If you can abrade the surface by sanding, you will increase your chances of success. If you choose to proceed, test for adhesion on a hidden area of your project before getting started.
  • If you are applying GF Gel Stains over existing "sealed" finished wood or any impenetrable surface, TRIPLE OR QUADRUPLE the drying times of all the finishes used because the stain cannot soak into the surface.
  • De-Glossers: GF does not recommend the use of a de-glosser as a REPLACEMENT for prep sanding and cleaning. They are sold by manufacturers that advocate that it is ok to cover up dirt and grime, which can create a problem. GF feels that appropriate cleaning and sanding delivers a better result and saves money.
  • If you have physical issues with the labor of sanding, at least clean the project before using a de-glosser.

APPLYING GEL STAIN DIRECTLY TO LAMINATE:

  • “Power clean” by scrubbing with a solution of water and a strong detergent such as Dawn or Spic & Span, using a Scotch-Brite pad. Rinse thoroughly.
  • Then follow with a second scrubbing with a 50:50 mix of denatured alcohol and water, also using a Scotch-Brite pad. Let dry completely.
  • Sand with a power sander. 150-grit followed by 180-grit sandpaper. (some users reported using 220 grit sandpaper). Wipe off the dust.

You can apply Java Gel Stain several ways:

  • With a roller for a painted effect (from ABHall), painting on with a chip brush followed by pouncing with a plastic bag for a textured effect.
  • Brushing on followed by a mineral spirit dry-brush technique. See mineral spirits dry-brushing technique in this video
  • Apply a slip-coat of mineral spirits first using a chip brush to give you more open time. While the mineral spirits is still wet, paint the Gel Stain on using a chip brush. While the Gel Stain is still wet, GENTLY smooth out the surface with a folded blue shop towel going in the direction of the grain. 
    Tip from Andrea Allred: Dry brush Gray Gel Stain on top the next day for a weathered look. 
  • Paint on two coats of Gel Stain, letting each coat dry 72 hours. Create the look of faux wood by sanding each coat lightly.
  • Allow the Gel Stain to DRY 72 HOURS. If it is still tacky and cool to the touch, let it dry for days. Let it dry, let it dry, let it dry. Lack of dry time over existing surfaces is the number one reason for Gel Stain failure!
  • Seal with 3 coats of topcoat, allowing triple dry time. As previously stated, you can use Arm-R-Seal over dark colors and High Performance over light colors.

NOTE: When using fine wood finishes, water and spills must be wiped up in a timely fashion. If this a high-use area near a sink, consider replacing the countertop instead. If this a low-use area such as a bedroom dresser that needs a tune-up, you will be fine.

ADHESION TEST:

Test your entire procedure (preparation to topcoat) on a hidden area first and let it cure for 7-10 days. Then further test the finish by duplicating normal wear and tear: washing, scrubbing, scratching, etc. to make sure the finish bonds to the surface.

See more General Finishes FAQs here.

Related Categories


*Does Milk Paint Need To Be Sealed with a Topcoat or Wax?

No, General Finishes Milk Paint is premium paint developed for commercial applications and is durable enough to stand up to most wear without top coat.

If increased sheen or maximum durability for high-use areas (cabinets, table tops) is required, GF recommends applying 2-3 coats of GF's High Performance or Enduro professional topcoats.

When working with a white Milk Paint color, GF recommends that you use a wood primer such as General Finishes Stain Blocker beforehand, and seal with General Finishes Enduro White Poly or General Finishes Brushable White Enamel.

General Finishes offers Satin Finishing Wax, High Performance Topcoat in 4 sheens (Flat, Satin, Semi-Gloss and Gloss), Flat Out Flat Topcoat and Glaze Effects to compliment the Milk Paints.

Milk Paint is also a superior exterior-rated finish.

Related Categories


*How Can I Improve Coverage When Using White Paint on Furniture?*

A primer is your best defense under light-colored paint.

Another technique to avoid the slight color change that sometimes occurs when applying topcoat is to add 10-15% of the paint you are using to your topcoat. This technique layers additional coats of color over your piece as well as providing the protection of a topcoat. If you don't like measuring, just add enough paint until you can see a bit of the hue in the topcoat. This method works with a brush or a spray gun.

To maintain the full-strength protection of the topcoat, DO NOT TINT YOUR FINAL COAT of topcoat.

Remember, NEVER EVER paint an existing piece of furniture with a light paint without proper preparation AND a stain blocking primer. Topcoats can activate tannins in the wood, or dyes in the previous finish, causing yellow or pink bleed-through. We recommend General Finishes Stain Blocker, which has been developed specifically for upcycling furniture and has proven to be 100% effective when two coats are applied, or Zinsser BIN.

Here is a sample finishing schedule:

  1. Prep clean and sand
  2. Three coats of paint (or four if needed)
  3. Two coats of topcoat mixed with 10-15% paint
  4. One coat of topcoat

VIDEO: How to update or refinish cabinets and woodwork light paint color using a sprayer.

Related Categories


*How Do I Apply White Milk Paint Over Cabinets That Have Been Burned?

GF recommends that you replace the doors if you want to use a white paint like General Finishes Antique White Milk Paint. Some things are not meant to be and painting charred doors is a recipe for trouble. The charring will bleed through.

Related Categories


*How Do I Prevent Light Colored Paint from Yellowing When Applying Water Based Topcoat?

All bright white paint will yellow slightly with time, even without topcoat. You have probably tried to touch up white woodwork in your home after several years and noticed that the new paint is brighter.

But white and light paints can react if clear coated with a waterbased finish; water-based topcoats are reactive and may draw out substances in the wood such as tannins, dyes or unknown substances in existing finishes causing the topcoat to yellow. This is an industry-wide issue and can happen right away, years later or never.

There is no way to reliably predict yellowing ahead of time. Every existing finish is different and we rarely know the finishing provenance on a previously finished piece. Every tree is different; every piece of wood is unique. Wood can bleed tannins immediately after the topcoat dries or months later with a change in temperature that comes with a change in seasons. Oak, pine, mahogany, and Douglas Fir are particularly prone to bleed-through.

Throughout all of our testing, General Finishes water-based topcoats are clear drying over a non-reactive substrate such as plastic or metal but when applied to something as unpredictable as wood, it is best to play it safe.

To reduce the occurrence of yellowing, we formulated Stain Blocker, a chemical stain and tannin blocking primer, and Brushable White Enamel. But the safest route is no use of topcoat over whites and light paint. As all of our white pigmented paints are self-sealing and do not require a topcoat, we warn users as follows:

CAUTION: Do NOT use any water-based clear coat over bright whites such as GF Snow White Milk Paint, or GF White Poly as it may cause yellowing. Lighter-colored paints may alter slightly with a topcoat application, but the color shift is less noticeable. Any clear coat can become reactive over wood substrates or existing finishes, causing tannin or dye bleed-though regardless of priming. All of GF's white paints do NOT require a topcoat.

TIPS FOR PROTECTING YOURSELF AND PREVENTING YELLOWING

  1. Don't apply any clear coat when using light or white paints. Topcoat is perfectly fine over darker colors.
  2. Always prime white paint with a paint system: Gf recommends either 2 coats of Stain Blocker or White Undercoat.
    • Over raw wood: Apply two coats of Stain Blocker or Enduro White Undercoat, then 1-2 coats of Brushable White Enamel, White Poly (spray only), or Milk Paint.
    • Over an existing finish: Apply two coats of Stain Blocker, then 1-2 coats of Brushable White Enamel, White Poly (spray only), or Milk Paint. Always let any primer dry overnight. Many primers suggest a 3-hour dry time and that is not enough.
  3. We offer three types of self-sealing pigmented paint.
    • Milk Paint: A clear topcoat is not required on our Milk Paint for increased durability. It is a self-sealing, exterior rated coating with very high-performance properties. However, higher sheen topcoats provide a smoother surface that is easier to clean for high use projects such as tabletops and kitchen cabinets. Topcoat is fine for darker colors, but not for light or white Milk Paint. In those cases, use Brushable White Enamel (available in Satin or Semigloss) or spray our pigmented White Poly (available in Flat Satin or Semigloss.)
    • Enduro White Poly: Use a professional sprayable "white coat" such as our professional Enduro White Poly. It is a white paint with "increased topcoat properties", is a stand-alone finish when 3 coats are applied and does not require sealing with a topcoat.
    • Brushable White Enamel was developed as a stand-alone finish for those who want a bright white but do not use spray equipment.
  4. Use disclaimers in your contracts. Upcharge for the extra coats needed and never guarantee a white finish over a piece when the customer wants a topcoat. Here is a suggestion for your contracts: 

    Terms of Agreement and Warranties: ________ (Initials) I have been informed that more coats are required when painting with bright whites, reds, greens or yellows. I understand that white paint can yellow over time and water-based topcoats can react with the substrate or existing finish under white paints causing yellowing, even if a stain-blocking primer is used. I have been informed that topcoat over white or light paints should NOT be used.
  5. Always test your project's ENTIRE finishing schedule (from cleaning to topcoat) on an inside door or a more hidden area of the piece. This does not help if the yellowing occurs later but you will at least know if there is an immediate problem.
  6. If you are working on period pieces such as a 1940's serpentine mahogany desk which were often finished in stain containing aniline dyes that cast a pinkish bleed-through under light paint, stay away from light colors. Not every piece of furniture is suitable for up-cycling with a light paint color. Pine, Mahogany, and furniture of the 1940's and 50's are a red flag.
  7. Last, not all manufacturer's topcoats are compatible with other finishes and may react with a color change. Always follow best practices by not rushing, and testing to your satisfaction first.

WHAT YOU NEED TO KNOW ABOUT WHITE PAINT:

  • Bright white paints can yellow over time with or without topcoat. It is the nature of oxidation.
  • The underlying finish or wood species can affect the final color of light paint.
  • Details and inside corners are difficult to cover with any paint color, but this property tends to be more noticeable with whites. This is a naturally occurring phenomenon in paint application and does not necessarily constitute a defect in the paint finish or your technique.
  • The more porous the paint (chalk paint vs an acrylic paint), the more likely that yellowing will occur. The topcoat is actually seeping through the spaces caused by the larger particles of filler that give chalk style paints their texture.
  • Whites have a lower “hide” quality and are more transparent than other colors. Most bright whites require additional coats to achieve the desired color and minimize color variation. This can increase the cost of paint finishing. Always include a clause in your contracts addressing the need for additional coats to achieve coverage.

IF YOU ARE A PAINTING PROFESSIONAL, DO NOT CARRY THE COST OF WHITE PAINT YOURSELF

Include the cost of the increased labor for applying white paints with a fair, reasonable up-charge. White paints, even if they did not yellow, require more coats and high-quality primers to achieve coverage. See our video How to Achieve a Bright White Finish that Lasts for more information.

If your white cabinets have yellowed, we recommend prep cleaning and scuff sanding, applying a coat of General Finishes Stain Blocker primer, finish sand and re-coat with another coat of paint.

Watch "How to Get a Bright White Finish" to learn more.

Related Categories


*How Do I Repair Chipping Paint Applied Over an Existing Finish?

There is no easy solution to this problem. General Finishes Milk Paint has strong adhesion properties but there are several reasons this finish could fail:

  1. The cabinets were not prep cleaned and sanded properly. Sanding and cleaning are an essential part of any refinishing process. Sanding lightly with the correct sandpaper grit will help clean and smooth the surface, but it will also abrade the previous finish which gives the new paint something to grip onto. Product may not adhere properly to a surface that is un-sanded or that is over-sanded (making the surface too smooth).

    In most cases, you can use a 220 sanding pad to scuff the surface and clean with a 50|50 mix of water and denatured alcohol.

  2. The surface was contaminated with a dusting spray that contained silicone. Silicone is usually impossible to remove. You can try scrubbing the surface with a strong detergent such as Spic and Span and warm water combination using a gray Scotchbrite pad. After that clean with denatured alcohol full strength.

    In most cases, you need to strip and sand, but there is no guarantee of success. Test a small area first.

  3. The surface was contaminated with a previous wax finish. Wax is also difficult or impossible to remove. Nothing adheres well to wax, and once you use it the wood grain can become contaminated. The wax can penetrate the wood, making future paint or stain finishes or touch-ups difficult or impossible. Even though there is internet chatter about removing wax with 3rd party products or mineral spirits, the risk of a failure in re-coating over a wax finish is very high.
  4. The surface was contaminated with an oil based soap.
  5. A lack of compatibility with the deglosser.
  6. A lack of compatibility with another manufacturer's top coat.

The most likely suspect is contamination. If any wax or silicone-based product has been used on the original surface, adhesion problems such as bubbling and chipping can be expected.

You could try spot sanding then repainting the chipped areas but that rarely is a good solution - we think the problem will continue to occur.

We recommend getting the cabinets into a paintable condition by doing the following:

  1. Sand back all the new paint and cleaning with a high strength detergent such as Spic and Span mixed with warm water. Rinse thoroughly and let dry.
  2. Prep sand with a 220-grit sanding PAD - do not use a finer grit or the new paint won't hold.
  3. Scrub with a Scotch-Brite Pad and a 50\50 mix of denatured alcohol and water. When preparing any surface we highly recommend using a 50/50 mix of denatured alcohol and water instead of commercial cleaning solutions.

    The mix is more effective because it has a higher alcohol content, you can get denatured alcohol locally, and it is cheaper. Many commercial cleaning solutions have extremely high VOCs while denatured alcohol is much lower.

    Furthermore, the 50/50 mix does not have salt in it. The salt in commercial cleaning solutions could linger in the substrate and cause salt contamination when clear coating at the end of your project, which could create a white haze.

  4. Test one door, letting the surface cure for 7 days to see if the problem duplicates itself. If this is silicone contamination, it may be impossible to remove the silicone completely.

If your test does not work, stripping is the only answer. We know this is not what you want to hear, but we hope that this insight will help you to achieve your desired end result.

Future forward, when working with a pre-existing finish with no knowledge of previous wood care, always test a hidden area before proceeding with the entire project.

Watch how to power prep existing high-use finishes for stain or paint like kitchen cabinetry here.

Related Categories


*Is General Finishes Milk Paint Different From Their Professional Paint Line?

Both products are exactly the same - the only difference is size. Professional paints are sold in gallons for use in spray applications, whereas Retail Milk Paints are sold in pints and quarts.

General Finishes are particularly durable because they were originally created for commercial use.

Related Categories


*What is the Best Applicator to use for Milk Paint and Water Based Topcoat?

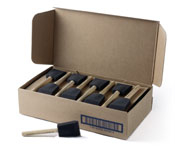
Either bristle or foam brushes will work well with Milk Paint and Top Coat. The folks at GF might use several types of brushes for a project.

For example:

  • We like to use a bristle brush (which loads up more paint) to get Milk Paint on the surface, and then use a water or Extender dampened foam brush to smooth out the finish.​
  • ​​​​​​Bristle brushes are particularly helpful on vertical and detailed surfaces but they can produce subtle texture.
  • Foam brushes tend to produce a smoother finish which can be particularly helpful on flat horizontal surfaces.
  • Pad Applicators or paint rollers are also helpful on larger horizontal surfaces such as a table top.

For folks who don't want to invest in several brushes, the foam brush is our recommendation.

The very best application method is spraying.


Related Categories


*What Is the Best Way to Store Water Based Finishes?

LIFE OF PRODUCT

Water-based products do not last forever, even when unopened. General Finishes products are best used within 1 year of the manufacture date listed on the bottom of the can. The life of the product may be extended to 2-3 years with proper care and storage.

SETTLING

Gravity can cause some solids to settle on the bottom of the can and slight separation on the top. This is normal. If working with older paint, use a paint mixing attachment on a drill. If the solids dissolve and clumps smooth out after mixing from the bottom, the product is in good condition for use.

STORAGE TIPS

See video tutorial: Tips on Storing Leftover Finishes 
Water-based finishes crystalize and form a skin due to evaporation when the air-tight seal on a can is broken at first use. The following best practices will increase the life of your product:

  1. Pry open sealed lid(s) with a paint can opener by hooking under the lid's rolled edge. The use of a screwdriver can disfigure the rim and lid, impairing a complete seal.
  2. Keep lid(s) closed while working. Pour what you will use into a bowl, paper cup, or plate, and close can lid as you work.
  3. CLEAN the chime of the can(s) thoroughly with a paper towel before closing to create a complete seal. Paint in the chime can be minimized by using a pouring lid, such as Fitsall. Avoid wiping used brushes on the lid.
  4. Pound the lid(s) in place using a rubber mallet to avoid distorting the chime or lid. Dents in the lid from direct contact with a hammer can impair a complete seal. Alternatively, place a flat piece of wood over can lid and firmly pound shut.
  5. Store in moderate temperatures. Avoid temperatures below 50*F/10*C or above 80*F/26*C. Frozen and heat-damaged product cannot be revitalized. Temperature-controlled spaces, such as a basement, are ideal for storage. Do not store product in an attic, garage, in direct sunlight, or next to something warm like a water heater or furnace.
  6. Store the can(s) upside down to create a liquid seal, minimize evaporation and reduce the chance of crystallization. Decant remaining product from the can before stirring.
  7. Decant leftovers to a smaller container when the finish is almost used up. Alternative storage containers for water-based products are plastic FIFO bottles or glass bottles. Do not fill metal-lidded containers completely to prevent them from rusting.

The following water-based product mixtures can be stored:

  1. Product combined with up to 15% General Finishes Extender or General Finishes Accelerator can be stored, with the exception of thinned General Finishes Water Based Wood Stain.
  2. Mixtures involving colors & sheens within the same product line, such as:
    • High Performance Satin + High Performance Gloss
    • Snow White Milk Paint + Coastal Blue Milk Paint
    • Amber Dye Stain + Merlot Dye Stain

The following product mixtures should NOT be stored:

  • Any water-based product with thinned tap water; water often contains bacteria that will adversely affect stored paint.
  • Topcoat + Stain or Paint
  • Milk Paint + Chalk Style Paint
  • Water
  • Water-Based Wood Stain + Dye Stain

Related Categories


*What is the Difference Between Latex and Acrylic Paint?

The word "latex" is often a misnomer and is used everywhere to differentiate a water-based product from an oil-based product. The same as the word “Kleenex” is used to describe any type of facial tissue, regardless of the brand.

Today, "latex" is the technical term for a suspension (U.S.) or emulsion (European) of microparticles in water.

Latex (a plant-based derivative) was never one of the early ingredients used as a binder, the material that holds all the ingredients together and imparts adhesion, in paint. Binders that are commonly used include synthetic or natural resins such as alkyds, acrylics, vinyl-acrylics, vinyl acetate/ethylene (VAE), polyurethanes, polyesters, melamine resins, epoxy, or oils. Acrylic paint is called that because an acrylic resin is used and not all resins are equal.

CAN I USE “LATEX” WALL PAINT FOR FURNITURE?

Yes, you can. You should differentiate between the “standard” wall paints and the “performance” wall paints, such as Advance by Ben Moore.

The problem with “standard" wall paints is performance. The majority of latex wall paints are designed and engineered for a different purpose: and that is to have great coverage…..on a wall.

Walls simply don’t have the wear and tear that other horizontal surfaces do, so wall paints are manufactured with fewer resins and more of the cost competitive fillers. This helps keep the cost down, which makes sense. 

WHAT IS THE DIFFERENCE BETWEEN 100% ACRYLIC WALL PAINT AND 100% ACRYLIC FURNITURE PAINT?

The first is the quality of the resin.

There are thousands on the market and they are not all equal. Resins affect cure time. The newer, performance wall paints, such as Benjamin Moore’s Advance, needs almost 20-30 days to FULLY cure for physical use in lab tests, but on a wall that does not matter - folks don’t walk on walls.

Furniture and cabinet finishers need a faster cure time. Furniture and cabinets may need to be stacked, packaged or used fairly immediately, so the resins are selected are based on cure time properties.

The second difference is the amount of filler used.

Both wall paints and furniture paints may use 100% Acrylic as the resin. Most interior house paints tend to be a combination of a binder, which is more expensive, (such as latex, acrylic, vinyl, vinyl acrylic, and others), a whole bunch of less expensive fillers such as calcium carbonate or talc, some pigment for color and water. The fillers in wall paint give it great coverage and allow the paint to be manufactured at a lower price point, but sacrifice durability and performance. Imagine wall paint as a can filled with 50% filler powder, some pigment colors, a little binder and then topped off with water. The higher end wall paints are a step up and improve this ratio but still tend to be less durable.

By comparison, a furniture paint may contain 30% filler powder, more binders and higher quality resins, pigments for color, and water. Chalk style furniture paints also have more filler powder than acrylic paints. That is why our Milk Paint is more durable than the average chalk style paint- the ratio of filler.

In summary, acrylic paints for furniture contain a higher ratio of resin to filler and superior resins.

High-quality acrylic resins give furniture paint the properties needed in the final finish: adhesion, hardness, flexibility (expansion and contraction with temperature changes in outdoor applications), good scrub resistance and superior color. These paints excel when it comes to flow, leveling and easy brushing. And these paints cure for use and recoating faster.

Related Categories


*Why Are My Painted Kitchen Cabinets Cracking in the Corners After Turning Up the Heat - How Can I Fix The Cracking?

Cracking Paint

This issue is caused by a change in humidity in the house when the winter heating season starts. This is a very typical problem when painting over existing finishes. The cracking is a result of expansion and contraction.

When you apply numerous heavy layers of primers, paints, and topcoats, they can crack at the joints or angles when the humidity changes. The cracking occurs when the door panel shrinks and breaks the heavy paint layer.

There are two options when it comes to fixing this problem: 

  • Fill the cracks with painters caulk and reapply the paint and clear coat. 
  • Leave it alone and wait until spring when the cracks will close back up. 

Putting a humidifier in the room may also help close the gaps.

Painting cabinets in the winter is the best way to avoid this problem because there is no humidity. That way when the wood swells up in the hotter months and then shrinks back again in the cooler months, there is minimum cracking or damage. 


Related Categories


*Why Are Some Milk Paint Colors Thinner and More Translucent Than Others?

The ability of a paint to "hide" (cover) the existing underlying finish color is dependent on a number of factors.

One factor is colorants and the other is filler. Colorants affect the viscosity of durable furniture paints, making some paints thinner than others. GF could add more filler, making Milk Paint similar to wall paint, but that would reduce the durability.

Bright, organic colors such as blues, greens, reds, yellows and whites are thinner. Unfortunately, this a problem common among highly durable paints in the industry.

When covering existing medium-dark finishes, at least 2 coats of primer is recommended. Even with the use of a primer, additional coats of paint may be necessary.

When covering lighter colored finishes, it may take 3+ coats of paint to achieve acceptable hide.

Related Categories


*Why Do Milk Paint and Chalk Style Paint Separate in the Can, Even After Stirring?*

The separation is a condition the paint industry calls "float." This is typical with specific colors, such as grays, because of the large variance in the gravities of the pigments required to create those colors. In gray, for instance, Ti02 (white) is 3.4 and black is 1.62. The lower density will float.

This phenomenon will not occur in colors with less variance in densities. Float is not unique to General Finishes products.

Always stir the paint well just BEFORE and DURING use. If there is any delay, the ingredients will start separating. If it is a large project, we recommend continuing to stir throughout use to keep color properties consistent.

Related Categories


*Why Does GF Milk Paint Look Different When Applied with a Spray Gun Versus a Brush Application?

Milk Paint Color Seperation

Milk Paint is not like a filler-based wall paint. It is engineered for high-use applications such as tabletops and cabinets that require considerably more durability than a wall. The resins that make Milk Paint durable change the properties of it, so you have to handle it differently.

The type of applicator you use will change the thickness of the film and affect the appearance GF Milk Paint.

When refinishing kitchen cabinets, our contractor customers often roll the face frames and spray the doors. If there are any corners or edges that need to be filled in with a brush, they will fill in before spraying or rolling. Then, they will complete the entire section with one type applicator.

With this approach, you will notice a slight difference between the frame and the cabinet door, but the difference is considerably less obvious than it would be if you sprayed and rolled on this same surface. 

Secondly, always stir the can well just BEFORE and DURING use. When working with a large project, we recommend continuing to stir during use to keep color properties consistent. If there is any delay, the ingredients will start separating.

Color separation is a condition that the paint industry calls "float". This is very typical with specific colors such as grays because of the large variance in gravities of the pigments required to create the color. In gray for instance, Ti02 (white) is 3.4 and black is 1.62. The lower density will float. This phenomena will not occur in colors that have less variance in densities.

Related Categories


*Why is my application of Milk Paint not adhering on previously finished cabinets?

There are several reasons:

1. The cabinets were not prep cleaned and sanded properly. Sanding and cleaning are an essential part of any refinishing process.

In most cases, you can use a 220 sanding pad to scuff the surface and clean with a 50|50 mix of water and denatured alcohol.

Video Tutorial: How to Prep Existing High Use Finishes for Stain or Paint

2. The surface was contaminated with a dusting spray that contained silicone. Silicone is usually impossible to remove.

There are no guarantees with silicone - it is almost impossible to remove. Unfortunately, silicone contaminants, often from dusting sprays, do not become apparent until a new finish is applied and generally cannot be removed from the surface, only moved around and possibly sealed - a bane of the refinishing industry.

You need to power clean the existing finish and put on some type of barrier coat:

  1. Power clean the surface by scrubbing with a strong detergent such as Spic and Span and warm water combination with a gray Scotch-Brite pad. There is also a product called Purge All (Potassium Hydroxide) that works well against silicone contamination. Scrub with green scotch bright pad to remove silicone. It's similar to Spic & Span ( detergent). Others have recommended dishwasher pods dissolved in warm water help break down the oils. After that, clean with denatured alcohol full strength.
  2. Apply 3 coats of dewaxed shellac. Allow each coat to dry thoroughly.
  3. Then cross your fingers and test. Test the first coat of finish by rubbing a nickel across the finish. Or lightly scrape with a blunt table knife (not a sharp or serrated knife).

In most cases, you will need to strip and sand, but even then there is no guarantee of success. If the silicone has migrated into the wood grain through cracks in the old finish, you may not be able to get it all removed.

3. The surface was contaminated with a previous wax finish.

Even though there is internet chatter about removing wax with 3rd party products, mineral spirits or vinegar, none guarantee success. There is an old saying in the industry. "Once you wax, you cannot go back". Nothing adheres well to wax and even after cleaning, the wood grain can become contaminated. Wax can penetrate the wood, making future paint or stain finishes or touch-ups difficult or impossible.

The risk of a failure in re-coating over a wax finish is very high. Your best bet is to clean, strip, and sand, but even that is problematic. Here is what we recommend if you want to go ahead.

  1. Scrub with a solvent, such as mineral spirits, to break the wax barrier. Follow with several applications of Acetone applied with gray scotch bright pads to scrub the surface.
  2. Then strip the surface. You want to remove as much wax as possible before sanding to minimize the risk of driving the wax into the grain of the wood from the friction of sanding.
  3. Strippers that contain Methylyne Chloride like Zip Strip or Savograns are aggressive strippers but harsher. Gentler strippers are citrus of soy-based such as Citrus Strip or Soy Gel.

After cleaning, test the first coat of finish for adhesion. Rub a nickel across the surface or ccrape the first coat lightly after 24 hours with a moderately sharp object such as a blunt standard table knife, not a sharp or serrated knife.

GF does offer a beautiful liquid was; General Finishes Satin Finishing Wax, but we recommend the use of topcoats such as our water-based General Finishes High Performance over dark paint colors or General Finishes Flat Out Flat over low use surfaces for a reliable sealant. We promote glaze effects and stains as other means for adding depth to refinished furniture.

4. The surface was contaminated with an oil-based soap.

5. There was not enough dry time in between coats relative to the temperature and humidity. Ideal Conditions are 70 degrees F and 70% humidity. Refinishing furniture in a space that is below or above the 65-75 degrees F range can lead to problems. The colder your space it is, the longer you have to wait between coats. Cold temperatures slow the dry time and affect how quickly the finish will level, harden and cure.

Our easy rule of thumb is; if it is cold enough to wear a sweater it is too cold to apply a water-based finish.

Related Categories


*Will Milk Paint Adhere Over a Paper or Vinyl Veneers ?

Vinyl or paper veneers can be often found on the end returns of lower price-point cabinets. We cannot guarantee that our paints will adhere well to a paper veneer - we have no idea what the actual material is or what adhesives were used to apply the veneer to the surface. The resins and additives in our paints may break down the adhesives used for the veneer.

And Milk Paint does NOT adhere to vinyl.

General Finishes Milk Paints have an excellent adhesion factor and might well be successful. If you can abrade the surface with sandpaper, you will increase your chance of success.

For best possible results, follow these steps:

PREPARATION

TEST

Test your procedure on a hidden area first and let cure for 7-10 days. Then further test the finish by duplicating normal and tear such as washing, scrubbing, scratching, etc to see if the finish has bonded to the surface.

PRIMER

If your finish adheres well, you should be ok to continue. If the finish comes off easily, we recommend trying a sealing binder primer before you apply the paint, such as XIM 400 White Primer Sealer Bonder or whatever is recommended for paper veneer at your local hardware or paint store. Again, TEST!

APPLY PRODUCT

Apply product directly over the primer and seal with 2-3 coats of GF Top Coat. We recommend using General Finishes High Performance Topcoat over Milk Paint because it's water-based and dries clear.

Related Categories


Can GF Milk Paint be wet distressed?

General Finishes Milk Paint can not be wet distressed after it has dried.

All paints are developed for different purposes. Standard latex paints are designed to cover walls, not objects under every day use. Exterior finishes are engineered to be flexible to withstand wide ranges of temperatures in outdoor conditions. GF Milk Paint is a durable commercial grade coating for interior and exterior applications. It is formulated for furniture, cabinets and millwork. General Finishes specifically selects resins to achieve this objective. Our Milk Paint can be easily distressed by hand or with a sander within the first 2-3 hours after application. The longer Milk Paint cures, the harder it is to sand. Each type of manufactured paint has a different look, feel and intended use. Some paints are smooth and hard, while others are textural.

Choose your paint based on the look you want to achieve balanced with the way you intend to use your piece. 

Related Categories


Can I use General Finishes Milk Paint over an existing finish that is chipping?

FAQs Existing Finish Chipping

If your current finish is chipping, it is failing to adhere correctly. The adhesion problem could be caused by several reasons:

  1. Improper preparation: Cleaning an existing finish removes dirt, grime and many common contaminants such as oil from hands. Dirt, grime and oil prevent good ahesion causing the possiblility of chipping, peeling and flaking - all signs of a failed finish.
  2. Contaminants from dusting sprays that contain silicone will also impact the appearance and adherence of a finish - silicone is almost impossible to remove. Oil soaps and wax can also cause ahesion failures.
  3. The previous paint was a "chippy style" paint, such as an original casein based milk paint that does not contain the necessary resins for high durability

We would not recommend applying any of our products over a failing finish, because the underlying finish could continue to present adhesion problems. Your only recourse for a good result is to remove the current finish by stripping and sanding.

Related Categories


Can I use General Finishes Milk Paint over an existing finish?

Yes. Be sure to prep clean and sand, and test a small area for adhesion.

Related Categories


Can Milk Paint be applied to an existing Glossy surface?

Glossy surfaces have the most risk of poor adhesion.

  1. Clean your project with a Scotch Brite pad and a 50/50 mix of denatured alcohol and alcohol. Do not use mineral spirits with a water based product. SECOND, sand with 150 or 180 grit. Sanding is critical to the success of every finishing project as it further cleans the surface and opens up the grain to improve the adhesion of the new paint or finish.
  2. TEST your procedure on the inside of a door first, letting the paint cure for 14 days. Then test the finish by duplicating normal wear and tear: washing, scrubbing, scratching, etc to see if the finish bonds to the surface.
  3. The cabinets may need to be de-glossed with a de-glosser solvent available at any paint store.

Related Categories


Can Milk Paint be applied to raw MDF or masonite?

Yes.

MDF

  1. Apply Kilz or Bin 123 Primer first. 
  2. MDF is not as absorbent as natural wood, so wait 2 days in between coats and before applying top coat.
  3. MDF also tends to cast a brown color. If you are using a white paint, apply a coat of SeaGull Grey first to counter the brown, and then apply a couple of coats of white over it, allowing all coats to dry 2 days.

Learn more about how to prep MDF before applying GF Milk Paint.

Masonite

Masonite is harder than MDF. It will also need to primed with a bonding primer like XIM. XIM is known for its high-quality primers that bond to "Tough-To-Paint" surfaces like porcelain, tile, glass, plastics, and more.

Related Categories


Can Milk Paint be used outside?

Milk Paint is an exterior rated product and is ideal for outdoor projects. Topcoat is not required.

Related Categories


Can oil based topcoats be used over Milk Paint?

Oil based top coat can be applied over Milk Paint so long as 24 hours wait time is allowed between the two products. When moving from a water based product to an oil based product it is essential that the first is dry before applying the second.

Related Categories


Do I need to add a wetting agent such as Floetrol to General Finishes Milk Paint?

No. General Finishes already adds excellent wetting and flow agents to our Milk Paint. Adding another wetting agent is superfluous, and it may even be harmful to your finish if the formulas don't coordinate.

Milk Paint can be thinned if desired with 5-10% distilled water. You can increase "open time" if needed with 10-15% GF Extender. GF Extender will improve the flow, leveling and give more working time in hot, dry climates. 

Related Categories


Does GF Milk Paint require primer?

GF Milk Paints are self-sealing so it is not necessary to use primer.

You may use a white pigmented stain-blocking primer if you need to cover grain, paint light or white color on dark wood, or if you're painting a wood that is known to bleed, such as pine or mahogany. We recommend using General Finishes Stain Blocker, Kilz or Zinsser white pigmented shellac-based primers.

Warning: sometimes it is impossible to block bleed through. Always test. Not all projects with existing finishes are candidates for light paint colors. If this happens, start turning your thoughts to Lamp Black Milk Paint - that will cover a lot of problems.

Related Categories


How do I apply Milk Paint over Laminate?

APPLYING GENERAL FINISHES MILK PAINT TO LAMINATE

IMPORTANT: GF advises extra care and prep when applying any finish over laminate surfaces because they are specifically designed not to mar and therefore they are not very "sand-able", making adherence difficult.

  1. Power clean by scrubbing with a solution of water and a strong detergent such as Dawn or Spic & Span, using a Scotch-Brite pad. Rinse thoroughly.
  2. Then follow with a second scrubbing with a 50:50 mix of denatured alcohol and water, also using a Scotch-Brite pad. Let dry completely.
  3. Sand with a power sander.150-grit followed by 180 grit sandpaper. (some users report using 220 grit sandpaper). Wipe off the dust.
  4. Apply XIM 400 White Primer Sealer Bonder(follow label applications instructions but let dry longer, 12 hours or overnight.)
  5. Apply 2 coats of Milk Paint allowing triple drying time.

Related Categories


Is GF's Milk Paint a True Milk Paint?

GF's Milk Paint is not a true Milk Paint - it is premixed and does not contain any casein based ingredients. We named our product Milk Paint with the intention of putting a clear, bright, contemporary spin on an old fashioned furniture paint tradition.

It is designed to mimic the low luster finish of old world paints. It is our premium paint, carefully engineered for durability, ease of application and exterior use. All you have to do is prep your piece, stir the can and get started!

Here are some other qualities that make our Milk Paint stand out:

  • Extremely durable with great adhesion properties.
  • It is self-sealing. Additional sealant is not required if low to medium wear is expected. If extra durability is desired in high use areas or if you want a glossier sheen, GF recommends applying High Performance or one of our Enduro Professional Topcoats as a sealant.
  • Performs well on outdoor projects.
  • It's UV resistant, water resistant and scratch resistant.
  • Sprays beautifully.
  • It can be intermixed with other General Finishes Glaze Effects and Milk Paint colors to create custom colors. It is also a great companion to our water-based Stains, Dyes, Pearl Effects and Topcoats.

Related Categories


What are the renewable resources in General Finishes products?

General Finishes Renewable Resources Icon - Water Based Finishes

Renewable resources are a recent, eco-friendly advancement in the paint and coatings industry.

They are comprised of plant proteins such as corn; as well as conventional and innovative oils derived from plants such as Euphorbia lagascae, Vernonia galamensis from the sunflower family, and Calendula officinalis, aka marigold.

General Finishes products formulated with renewable resources meet the standard of excellence you have come to expect — including adhesion, coverage, color and durability — with all benefits of water finishes.

GF coatings made with Renewable Resources are: Enduro-Var II, Milk Paint, Water Based Wood Stain, Exterior 450 Stain and Wood Turner's Finish. Look for the green icon!

Related Categories


What Finishes & Coatings does General Finishes Offer for Retailers, Homeowners and DIY??

General Finishes offers water, oil, and maintenance finishes that meet the needs of homeowners, woodworkers, and DIY’ers. Comprehensive videos are available for each product on YouTube, plus dynamic comparison charts at GeneralFinishes.com/COMPARE.

All General Finishes water-based finishes are:

  • VOC compliant in all 50 states
  • Water cleanup 
  • Low odor
  • Non-flammable
INTERIOR PRIMERS

Water Based Stain Blocker is:

  • An epoxy acrylic formulation.
  • Prevents tannin bleed-through & discoloration.
  • Has high build with excellent adhesion properties.
  • Apply with a brush, roller, or sprayer.
WATER-BASED TOPCOATS & PIGMENTED FINISHES

High Performance Water-Based Topcoat is:

  • An Interior polyurethane/acrylic blend.
  • Clear drying.
  • highly resistant to water and household chemicals.
  • Apply with a brush or sprayer.

Flat Out Flat Water-Based Topcoat is:

  • An interior acrylic formulation.
  • Clear drying.
  • provides an extremely flat finish with high durability.
  • Apply with a brush or sprayer.

Enduro-Var II Water-Based Topcoat is:

  • An interior oil-modified water-based urethane.
  • Dries to a light, amber tone.
  • Made with over 50% renewable resources.
  • Apply with a brush or sprayer.

Water-Based Milk Paint is:

  • A premium interior and exterior-rated acrylic formulation.
  • Self-sealing and does not require topcoat.
  • Is made with over 50% renewable resources.
  • Is available in 12 popular colors, plus two tint bases.
  • Apply with a brush, roller, or sprayer.

Water-Based Glaze Effects is:

  • An interior oxidating acrylic formula.
  • Available in 6 colors, including a Clear Base.
  • Is a decorative specialty finish.
  • Can be intermixed to create custom colors.
  • It requires a topcoat
  • Apply with a brush, roller, or sprayer

Pro Image Water-Based Flooring Topcoat is:

  • An interior polyurethane.
  • Clear drying.
  • Levels to a smooth, hard, durable finish.
  • Provides excellent slip and black heel mark resistance.
  • Apply with a brush, roller, or pad applicator.
INTERIOR WATER-BASED STAINS

Water-Based Wood Stain is:

  • Made with over 50% renewable resources.
  • It’s available in 18 deep brilliant colors.
  • And provides universal coverage on many wood species.
  • Apply with a brush or sprayer.

Water-Based Pre-Stain Conditioner is:

  • Used to control blotching on hard-to-stain woods.
  • And to reduce Water Based Wood Stains.
  • Apply with a brush or sprayer.

Water-Based Dye Stain is:

  • A penetrating stain with ink-like consistency.
  • It is available in 14 vibrant colors.
  • And can be used as a toner.
  • Apply with a brush or sprayer or wiping on.

Water-Based Dye Stain Reducer is:

  • The clear base used to reduce Dye Stain colors.
WATER & OIL EXTERIOR FINISHES

Exterior 450 Clear Water-Based Topcoat is:

  • A polyurethane formulation.
  • Tintable to dark colors.
  • Contains UV absorbers & Mildewcides to protect the finish.
  • Clear drying.
  • Apply with a brush or sprayer.

 450 White Water-Based Topcoat is: 

  • A pigmented polyurethane formulation.
  • Is tintable to light and pastel colors.
  • Contains UV absorbers & mildewcides to protect the finish.
  • Apply with a brush, roller, or sprayer.

Exterior 450 Water-Based Stain is:

  • Made with over 50% renewable resources.
  • Available in 10 colors, including a clear base.
  • Contains U.V. absorbers & mildewcides to protect the finish.
  • Apply with a brush or sprayer.

Water-Based Milk Paint is:

  • A premium Interior and exterior-rated acrylic formulation.
  • Self-sealing and does not require topcoat.
  • Made with over 50% renewable resources.
  • Available in 12 popular colors, plus two tint bases.
  • Apply with a brush, roller or sprayer.

Outdoor Oil is:

  • A penetrating oil wood preservative.
  • Contains UV absorbers and mildewcides to protect the finish.
  • This finish will amber as it ages.
  • A maintenance product. Reapply when wear becomes evident.
  • Apply with a brush, roller or sprayer.
INTERIOR OIL STAINS & AMBERING TOPCOATS

Gel Satin Oil-Based Topcoat is:

  • A heavy-bodied, no-drip oil and urethane formula.
  • Designed to provide a hand-rubbed look.
  • Will amber as it ages.
  • Apply with a brush or wipe on.

Gel Oil-Based Stain is:

  • A heavy-bodied, no-drip formula.
  • Available in 14 deep, rich, uniform colors.
  • Apply with a brush, roller, or wipe on.

 Arm-R-Seal Oil-Based Topcoat is:

  • A penetrating sealer with a high-quality urethane formulation.
  • It provides long-lasting, durable protection.
  • and works beautifully on projects with detail.
  • This finish will amber as it ages
  • Apply with a brush or wipe on.

Liquid Oil-Based Wood Stain is:

  • a traditional, pigmented liquid wiping stain
  • Available in 14 colors
  • Can be used as a toner with Arm-R-Seal
  • Apply with a brush or wipe on.

Oil-Based Pre-Stain Conditioner is:

  • Designed to control blotching on hard-to-stain woods.
  • And penetrates the grain to promote uniform acceptance of oil stains.
  • Apply with a brush or wipe on.

Oil-Based Seal-A-Cell Clear is:

  • Formulated with a blend of oils, urethanes, and wax.
  • Is GF’s deepest penetrating close-to-the-wood sealer.
  • And the best choice for highlighting figured wood.
  • Apply with a brush or wipe on.

Hard Wax Oil is:

  • A urethane-solids polymer in a blend of oil & wax.
  • Enhances the natural look of wood.
  • One of our easiest finishes to use.
  • It’s best used with optional GF Hardener to shorten dry time and provide superior durability.
  • This is a maintenance product. Reapply when wear becomes evident.
  • Apply with a white pad or plastic spreader.

 Oil Based Wood Bowl Finish is:

  • A pure urethane formulation.
  • Highlights figured wood beautifully
  • Apply with a brush or wipe on.
INTERIOR MAINTENANCE PRODUCTS

Butcher Block Oil is:

  • A mineral oil formulation.
  • Meets all requirements for use on wooden surfaces that come in contact with food.
  • This is a maintenance product. Reapply when wear becomes evident.
  • Apply with a cloth.

Orange Oil is:

  • A routine cleaner for cured wood finishes
  • Non-combustible with a fresh orange scent
  • Apply with a cloth

Satin Finishing Wax is:

  • A blend of waxes.
  • Produces a soft sheen and feel over any wood finish.
  • Can be used as a polish for rubbing out new finishes OR as a scratch-remover.
  • Apply with a cloth.

No matter what your project is, General Finishes has the right product for you. General Finishes is dedicated to using the highest-quality ingredients in all our products, while testing and advancing our water-based finishes with leading-edge technology.

Learn more about GF’s products at Generalfinishes.com. 

General Finishes: We make tomorrow's finishes today.


Related Categories


What is the shelf life of GF Milk Paint?

GF is rather conservative regarding the life of our Milk paint. Water based products do not last forever, even when unopened. General Finishes products are best used within 1-2 years.

However, the life of the product may be extended with proper care and storage. If the can is in good condition, unopened and stored in correct temperatures, water based products can last 3-5 years. Avoid temperatures below 50°F/10°C or above 80°F/26°C and keep from freezing. Note, a can of paint that is 3 years old will not look like a can of paint that is 6 months to 1 year old. You will see stratification or separation, which is normal. Always stir thoroughly before using.

If your paint has a foul smell, the product is contaminated and is no longer in useable condition. Failure to reincorporate large, chunky lumps when stirring indicates the product has frozen and can no longer be used. 

Please be mindful of the manner in which your paint is stored and how long it's been in storage. It is not a forever product.

Storage Tips

Water-based finishes crystalize and form a skin due to evaporation when the air-tight seal on a can is broken at first use. The following best practices will increase the life of your product:

  1. Pry open sealed lids with a paint can opener by hooking under the lid's rolled edge. The use of a screwdriver can disfigure the rim and lid, impairing a complete seal.
  2. Keep lid closed while working. Pour what you will use into a bowl, paper cup, or plate, and close can lid as you work.
  3. Clean the chime of the can thoroughly with a paper towel before closing to create a complete seal. Paint in the chime can be minimized by using a pouring lid, such as Fitsall. Avoid wiping used brushes on the lid.
  4. Pound the lid in place using a rubber mallet to avoid distorting the chime or lid. Dents in the lid from direct contact with a hammer can impair a complete seal. Alternatively, place a flat piece of wood over can lid and firmly pound shut.
  5. Store in moderate temperatures. Avoid temperatures below 50°F/10°C or above100°F/38°C. Keep from freezing. Frozen and heat-damaged product cannot be revitalized. Temperature-controlled spaces, such as a basement, are ideal for storage. Do not store product in an attic, garage, in direct sunlight, or next to something warm like a water heater or furnace.
  6. Store can upside down to create a liquid seal, minimize evaporation and reduce the chance of crystallization. Decant remaining product from the can before stirring.
  7. Decant leftovers to a smaller container when the finish is almost used up. Alternative storage containers for water-based products are plastic FIFO bottles or glass bottles. Do not fill metal-lidded containers completely to prevent them from rusting.

Related Categories


Why does bright & white paint take so many coats to achieve coverage?

The opacity of a paint is the ability to "hide" the surface underneath.

Paints that have more hiding capacity are made with a "white" base which contains a larger combination of calcium carbonate and titanium dioxide. The calcium carbonate acts as a spacer to spread out the titanium dioxide, the most common ingredient used in paints to increase "hiding" properties.

Extra deep and extra bright colors have lower opacity because they start out in a "clear" base which contains only calcium carbonate. Very little titanium dioxide is added to a bright paint formula to help keep these colors vibrant, as with General Finishes Holiday Red or Klein Blue. Additionally, bright pigments have smaller particles which lowers opacity.

Neutral paint colors (light grays, browns, dark blues, dark greens, dark reds, etc.) contain a primary color(s) and a good amount of titanium dioxide, which provides excellent hide and requires fewer coats.

For example, if one coat of gray paint is put over a white surface, the outcome looks fairly gray. However, one coat of bright red paint over a white surface will leave a fair amount of white on the surface.

The opacity of paint (the ability to hide the surface underneath) has nothing to do with the viscosity (thickness of the paint).

The key is to learn the colors that are the most extreme among your favorite manufacturers and use them accordingly. This will help you plan time allotments for your project and your pricing.

Tip to improve coverage to reduce the number of coats using GF paints:

  1. Lay down a primer coat of a similar, high opacity paint first. For example, use Seagull Gray under Snow White; Buttermilk Yellow under Sunglow; Brick Red under Holiday Red; or Coastal Blue under Klein Blue.
  2. Use the correct applicator. For hand applications, a foam brush provides more coverage than a bristle brush.
  3. Always use a primer with light colors. This is especially true when painting over an existing dark finish.
  4. To achieve a bright white finish, use a combination of products from General Finishes paint system. For example, put down 2 coats of Stain Blocking Primer followed by two coats of Snow White Milk Paint or Brushable White enamel, or 2 coats of White Under Coat, followed by two coats of White Poly. All of our pigmented finishes are self-sealing and do not require a primer. Note: do not use a topcoat over white paint as it may cause yellowing.

This list below ranks the opacity of General Finishes Milk Paint colors. This contrast ratio testing was done on a sealed substrate with an 8 mil draw.

Contrast Ratio (Opacity)

Milk Paint Color

Contrast Ratio

Alabaster

97.80

Antique White

99.50

Ballet Pink

99.99

Basil

100.02

Blue Moon

100.06

China Blue

100.20

Coastal Blue

97.60

Coral Crush

98.20

Dark Chocolate

100.15

Driftwood

100.05

Emerald

99.65

Empire Gray

100.10

Gulf Stream Blue

100.10

Halcyon Blue

100.25

Harvest Yellow

98.20

Holiday Red

85.20

Keywest Blue

100.10

Klein Blue

83.00

Lamp Black

99.95

Linen

100.10

Millstone

100.15

Patina Green

100.10

Perfect Gray

100.15

Persian Blue

100.05

Persimmon

98.10

Queenstown Gray

100.50

Reverent Gray

100.05

Seagull Gray

100.30

Snow White

97.75

Sunglow

88.70

Tuscan Red

98.60

Twilight

100.10

Westminster Green

99.99

Related Categories