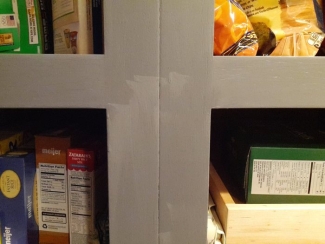
You can use GF products over wall paint but proceed with caution. Latex wall paints are engineered for a different purpose than wood finishes. Walls generally experience less wear and tear than horizontal surfaces, so they are manufactured without the resin systems that make furniture paint more durable.
DRY TIME: Latex wall paints should cure for 7-10 days before glaze or top coat can be added.
WARNING: Keep in mind that GF cannot guarantee an ideal finish when applying our products on top of or in combination with another company's products. We always recommend that you test for durability and aesthetics on an unseen area of your project before getting started.
General Finishes offers a complete coatings system with a finish for every objective.
General Finishes Professional, Industrial, and OEM Water-Based Topcoats
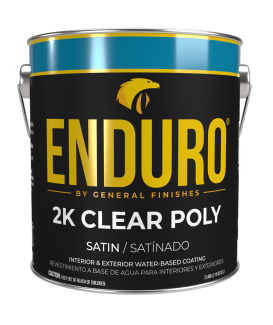
Enduro Professional Tintable 2K Clear Poly
Enduro Professional Tintable 2K White Poly
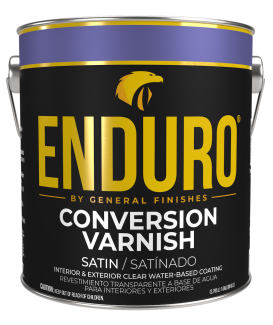
Enduro Professional 2K Conversion Varnish
Enduro Professional 1K White Poly
Enduro Professional 1K Clear Poly
Enduro Professional 1K Black Poly
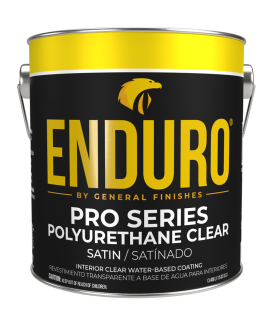
Enduro Professional Pro Series Clear Poly
Enduro Professional Pro Series White Poly
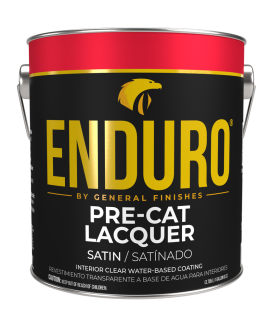
Enduro Professional Pre-Cat Lacquer
General Finishes Retail Water-Based Topcoats:
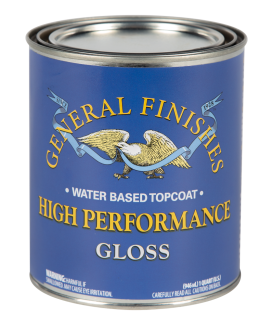
High Performance Topcoat
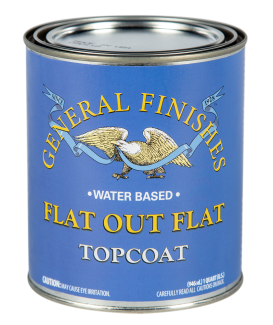
Flat Out Flat Topcoat
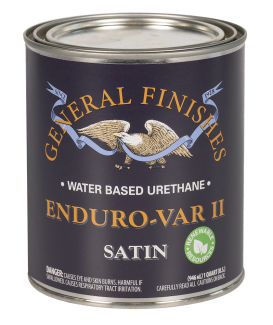
Enduro-Var II Topcoat
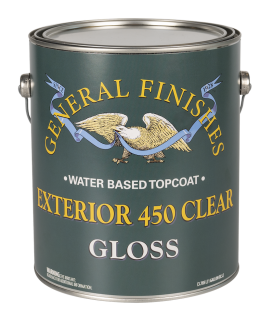
Exterior 450 Topcoat
Wood Turners Finish
General Finishes Exterior Water-Based Topcoats:
Enduro Professional Tintable 2K Clear Poly
Enduro Professional Tintable 2K White Poly
Enduro Professional 2K Conversion Varnish
Exterior 450 Topcoat
Exterior 450 White
General Finishes Oil-Based Topcoats
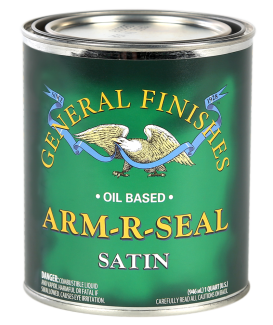
Arm-R-Seal
Seal-A-Cell
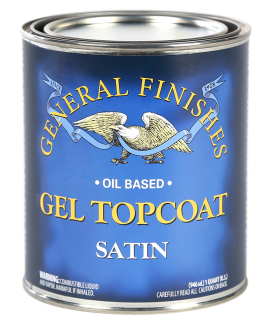
Gel Satin Topcoat
Wood Bowl Finish
Butcher Block Oil
Outdoor Oil
Hard Wax Oil
GENERAL PRACTICE:
Oil-based topcoats and ENDURO-VAR II will amber over time.
All other water-based and High Performance top coats dry clear.
Never use any water-based topcoat with long oils such as Danish, Tung or Linseed.
Water-based top coats clean up with soap and water. Oil-based topcoats require mineral spirits for cleanup.
If you use water-based topcoats over oil-based finishes, make sure that you wait 72 hours between the two products. It is essential to let the oil finish dry longer.
For more complex projects with many details and corners or large surface areas such as cabinets, we recommend either ARM-R-SEAL liquid oil-based topcoats or water-based topcoats. Large surfaces such as cabinets or tables and complex projects with lots of detail are easier to cover with a liquid topcoat rather than a GEL SATIN topcoat.
Enduro Professional Topcoats are thinner and intended to be sprayed
HIGH PERFORMANCE can be brushed or sprayed. It can be thinned by adding 5-10% distilled water if needed.
General Finishes flooring topcoat, Pro Image, is fortified with significantly more urethane to increase durability.
The slip rate of flooring topcoats is higher to improve floor safety and reduce the likelihood of slipping; approximately a 5.7 rating. For example, someone in socks is less likely to slip on a flooring finish, or a basketball player is less likely to slip on a good professional floor finish. Cabinet finishes have a much lower (negative) slip rate because folks want a silky, smooth finish on a cabinet or furniture; approximately a -.4 rating.
A floor finish has more elongation - the finish stretches to provide flexibility over expanding and contracting woods.
Yes! But you must follow ONE simple rule to ensure the best possible finish: the underlying finish must be absolutely dry.
When using a water-based product over an oil-based product, such as water-based High Performance Topcoat over oil-based Gel Stain,
If the oil finish was applied over raw wood, wait 24 hours between the two products.
If the oil finish was applied over an existing finish, wait 72 hours between the two products.
When using an oil-based product over a water-based product, such as oil-based Arm-R-Seal Topcoat over Water Based Wood Stain, wait 24 hours before applying the oil-based product.
Other Cautions
You cannot mix water- and oil-based products together.
General Finishes original Enduro-Var can only be used over raw wood or General Finishes water-based wood stains or dye stains. Original Enduro-Var cannot be used with any oil-based product, sanding sealer or shellac. Enduro-Var II (new formula) is compatible with all GF products and can be used over shellac.
Oil-based finishes amber over time; do not use them over white or very light colors.
According to the EPA "Volatile organic compounds (VOC) means any compound of carbon, excluding carbon monoxide, carbon dioxide, carbonic acid, metallic carbides or carbonates, and ammonium carbonate, which participates in atmospheric photochemical reactions." These carbon-containing chemicals that are labeled volatile because they easily become gases that enter the atmosphere. They include both human-made and naturally occurring chemical compounds produced by plant and animal processes.
Among the most common sources of VOCs are:
Acetone. Found in: nail polish remover, furniture polish and wallpaper.
Benzene. Found in: paint, glue, carpeting and emissions from gasoline combustion.
Butanal. Found in: emissions from barbecues, burning candles, stoves and cigarettes.
Carbon disulfide. Found in: chlorinated tap water
The main source VOCs in paints and stains are chemical solvents (the ingredients that allow the other additives to blend together) and chemical driers, materials that control dry time.
How can I find out how much VOCs are in my wood finishes?
Look for the manufacturer's SDS (Safety Data Sheet) on their website which contains a complete toxicity review for all pure chemical compounds manufactured and sold in the US, In the paint world, VOCs will vary by colorant, so an SDS should be provided for each color. If you cant find each product's SDS, ask the company for it.
GF’s water-based products meet all regulatory standards with full reporting disclosure in the form of an SDS (Safety Data Sheets) created by an independent regulatory agency. This is in accordance with the Global Harmony System established in 2015. SDS’s are required to be updated every three years from the original publish date.
What are the health risks?
According to the US Environmental Protection Agency, Health effects may include:
Eye, nose and throat irritation
Headaches, loss of coordination and nausea
Damage to liver, kidney and central nervous system
Some organics can cause cancer in animals, some are suspected or known to cause cancer in humans
How are VOCs regulated?
It's a complicated subject with inconsistencies across all states. VOC requirements are affected by:
Each state has different rules and regulations on VOC limits and shipment requirements.
Each regulatory body categorizes coatings differently. Flats, non-flats, primers, stains, varnishes and industrial maintenance coatings have different restrictions.
Some VOC limits are measured excluding water while VOC levels for Low-Solids Coatings are measured in grams of VOC per liter of material, including water.
Smaller sizes, such as liters or quarts are considered consumer products Vs. architectural products and as such are exempt from the new VOC standards in some regions.
Many solvents are exempt and not labeled as VOC's, such as acetone and ethyl acetate, because they react negligibly in the atmosphere. They do not form ozone at the same speed or to the same extent.
Some VOC measurements include all VOCs emitted from a product into the immediate air environment, while other measurements include only those VOCs that are regulated to control smog levels. According to the EPA, VOC labels and certification programs may not properly assess all of the VOCs emitted from the product, including some chemical compounds that may be relevant for indoor air quality.
Varying regulatory agencies are involved in regulating VOC limits in the coatings industry. This has led to inconsistency throughout the country. Agencies include the Federal EPA (Environmental Protection Agency), the OTC (Northeast Ozone Transport Commission), the Colorado APCD (Colorado Air Pollution Control Division), and CARB, the California Air Resources Board.
CARB has authority to set and enforce emission standards for motor vehicles, fuels, and consumer products; set health-based air quality standards; monitor air quality; identify and set control measures for toxic air contaminants and oversee local air quality districts.
California's SCAQMD (South Coast Air Quality Management District) tops the list as the most stringent agency responsible for improving air quality for large areas of Los Angeles, Orange County, Riverside and San Bernardino counties, including the Coachella Valley. See a list of SCAQMD regulations for 9 categories of coatings.
OTC, the Ozone Transport Commission is a multi-state organization created under the Clean Air Act (CAA). It is responsible for advising the EPA on transport issues and for developing and implementing regional solutions to the ground-level ozone problem in the Northeast and Mid-Atlantic regions. The OTC has several progressive versions of rules adopted by different states in the NE, creating inconsistency throughout the region. The latest Phase IV Model Rule restricts the shipment of gallons of non-VOC compliant finishes containing more than 250 grams of VOC per liter in most counties in the following states: Connecticut, Delaware, Maryland, New Hampshire, New York, Rhode Island, Pennsylvania, Virginia, Indiana, and Ohio. Utah has followed suit. You can read the draft for OTC Rule V here.
Colorado APCD issued a concept paper in January 2019 that stated that the Division is considering adopting the OTC Phase IV Model Rule for Consumer Products.
Are there VOC-free stains, topcoats and paints?
Reporting standards are imperfect and the definition of low and no VOC can be open to interpretation. Low-VOC or no-VOC products only address a limited range of compounds.
It becomes more complicated.
Some companies tout their products as zero-toxin, zero-carcinogen, and zero-VOC and never provide a Safety Data Sheet. The product can only be zero VOC if the base, the resins, the colorants, and other additives are all zero VOC.
Other manufacturers will claim Zero VOC, but it is only accurate for one color while the balance of the colors do contain VOCs. Or the colorants might be Zero or low VOC, but the tint bases are not.
What is a low VOC level in a paint or stain?
Water-based coatings will always have lower levels of VOCs than oil-based finishes. Beyond that, go as low-VOC as you can. The most used standard is 275 VOC gpl (grams per liter.)
To learn more about making the transition from using oil based finished to water based finishes, watch here
A good rule of thumb is to not mix brands. It might work, it might not. Most paint manufacturers formulate their products to be compatible within a "system" of products.
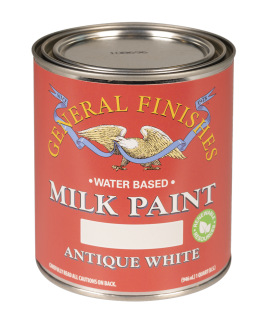
Milk Paint is not like a filler-based wall paint. It is engineered for high-use applications such as tabletops and cabinets that require considerably more durability than a wall. The resins that make Milk Paint durable change the properties of it, so you have to handle it differently.
The type of applicator you use will change the thickness of the film and affect the appearance GF Milk Paint.
When refinishing kitchen cabinets, our contractor customers often roll the face frames and spray the doors. If there are any corners or edges that need to be filled in with a brush, they will fill in before spraying or rolling. Then, they will complete the entire section with one type applicator.
With this approach, you will notice a slight difference between the frame and the cabinet door, but the difference is considerably less obvious than it would be if you sprayed and rolled on this same surface.
Secondly, always stir the can well just BEFORE and DURING use. When working with a large project, we recommend continuing to stir during use to keep color properties consistent. If there is any delay, the ingredients will start separating.
Color separation is a condition that the paint industry calls "float". This is very typical with specific colors such as grays because of the large variance in gravities of the pigments required to create the color. In gray for instance, Ti02 (white) is 3.4 and black is 1.62. The lower density will float. This phenomena will not occur in colors that have less variance in densities.
One of the causes of orange peel is the application of too much fluid and not enough atomization to break the product up into smaller droplets. It's similar to putting your finger over the end of a garden hose. Increase the atomization by using smaller fluid tips or a larger spray unit. See General Finishes comparison chart for generally recommended spray tips. Contact your spray equipment manufacturer's recommendations as well.
Another cause can be temperature. Refinishing furniture in a space that is below or above the 65-75 degrees F range can lead to problems, and a space below 55 degrees F is definitely too cold.
SPRAY APPLICATION OF GENERAL FINISHES WATER-BASED FINISHES:
All General Finishes water-based topcoats and wood stains are ready to spray from the container without additives with the exception of Conversion Varnish. Always strain material through a medium to fine mesh filter before spraying. If necessary, in hot or dry climates, reduce 10 to 15% with General Finishes Extender to extend the open time.
PRE SEALING:
Softwoods such as Pine absorb stain at an uneven rate and may respond better to staining if the wood is pre-sealed. General Finishes Pre-Stain Conditioner Natural can be applied to raw wood to condition the surface for uniform penetration of the stain. Pre-sealing will cause the final stain to be lighter so you may need to use a darker color. Always test your color on a hidden part of the furniture. Allow the Pre-Stain Conditioner to dry 30 minutes before applying your final stain color.
If you are using a sprayer that has been used for oil-based or lacquers, clean the unit thoroughly with acetone followed with hot water to purge the fluid passage. Apply a thin coat first that will dry and harden faster. Sand this first coat down to a smooth base on which to build your finish coats with a 220-320 grade foam sanding pad or #400-grit sandpaper. It is better to spray 2 thin coats rather than 1 heavy coat.
Contact your supplier to verify proper tip sizes for your specific equipment. GF's general recommended fluid tips for Wood Stains and Top Coats are Compressed air - .040 and Airless - .009.
This PDF lists general guidelines for several different types of sprayers with specific General Finishes product recommendations for HVLP listed below.
RECOMMENDED TIPS FOR GENERAL FINISHES PRODUCTS USING HVLP:
Milk Paint: 1.8mm-2.0mm
Stain Blocker: 1.8mm-2.0mm
Glaze Effects: 1.8mm-2.0mm
High-Performance Topcoat: 1.1mm-1.3mm
Flat Out Flat Top Coat: 1.1mm-1.3mm
Enduro-Var II 1.1mm-1.3mm
Water-Based Wood Stain: 1.1mm-1.3mm
Water-Based Dye Stain: 1.1mm-1.3mm
Exterior 450 Topcoat:1.1mm-1.3mm
Exterior 450 Stain: 1.1mm-1.3mm
Enduro Sanding Sealer: 1.3-1.4mm
Enduro White Poly: 1.3mm-1.5mm
Enduro Black Poly: 1.3mm-1.5mm
Enduro White Under Coat 1.5mm-1.8mm
Enduro Clear Poly: 1.1mm-1.3mm
Enduro Pre Cat Lacquer: 1.1mm-1.3mm
Enduro Conversion Varnish: 1.1mm-1.3mm
Air caps should be medium-sized. Contact your supplier to verify proper tip sizes for your specific equipment.
Break your work into sections, such as dresser top or drawer fronts. Spraying too large of an area can result in a textured grainy surface. A correctly sprayed finish should appear even and glossy. It is essential to apply a sufficient amount of material to ensure proper flow and leveling of the finish.
Spray medium-wet films at 3-5 wet mL thickness. Practice makes perfect. If you have never sprayed finishes before, take a large piece of cardboard and practice your technique first. Spray water on the cardboard to learn how the gun works. Check your fluid settings and adjust the controls to get comfortable with the spray angles and to develop your technique.
SPRAYING TOPCOATS:
Keep your gun at a 90* angle, 6-8" from the surface. On large flat areas, use wet, even patterns 6 to 8 wide. For narrow surfaces, reduce the fan pattern to 2-3" to reduce overspray. For topcoats, overlap each pass 25% to conceal lines.
Keep your gun at a 90* angle, 6-8" from the surface. On large flat areas, use wet, even patterns 6 to 8 wide. For narrow surfaces, reduce the fan pattern to 2-3" to reduce overspray. Overlap each pass of stain 50% for even coverage and wipe back the excess with an absorbent cloth. For narrow surfaces, reduce the fan pattern to 2-3" to reduce overspray.
SPRAYING WATER-BASED DYE STAINS:
Keep your gun at a 90* angle, 6-8" from the surface. On large flat areas, use wet, even patterns 6 to 8 wide. For narrow surfaces, reduce the fan pattern to 2-3" to reduce overspray. Overlap each pass of stain 50% for even coverage. If coverage is even, there is no need to wipe. If you have issues with uneven coverage, wipe back the excess with an absorbent cloth. For narrow surfaces, reduce the fan pattern to 2-3" to reduce overspray.
ROUGH, DRY SURFACE This is called dry spray. You may have sprayed too lightly.
Re-sand the finish with 320-grit sandpaper and apply a heavier coat. Keep your gun at 6-8" from the surface.
DIMPLES IN THE FINISH This is called orange peel, caused by spraying in temperatures that are too cool. Cooler temperatures will adversely affect how the finish will level and harden.
Water-based finishes must be applied at temperatures above 65 F. If it is cold enough to wear a sweater it is too cold to apply a water-based finish.
The surface of the wood must also be warm. If you turn the heat on when you enter your shop in the morning, the air heats up quickly but your furniture will still be cold for some time. Check the surface to see if it is warm.
Also, check the temperature of the finish. Warming cold finish by setting the can next to a heater or setting the container in some hot water for 5 minutes will improve the ease of application.
NOTE: Larger dimples are called "fish-eyes" or "craters". Cool temperatures can cause these, but the more likely source is contamination of the finish with either wax or silicone.
BLUSH Blush, the term for a cloudy, milky appearance in the finish, has two causes
1. The most common reason is an incompatible stain. For example, using a water-based topcoat over a heavy oil-based stain. When the top coat is applied, the oil in the stain seeps up through the finish and reacts with the acrylic causing a chemical blush.
To prevent this,
Increase dry times when changing from an oil-based finish to a water based finish.
Allow an oil-based finish to dry 72 hours before a water-based finish.
Allow a water-based finish to dry 24 hours over an oil-based finish.
Use a quick-drying water-based stain. If you choose to use oil based stain, seal the stain with a coat of shellac or lacquer sealer. This will provide a barrier between the oil and the acrylic. Proper drying time between the oil stain and finish coats is essential! The other cause for blushing is high humidity.
Spraying water-based finishes in humidities of over 75% may cause blushing because moisture becomes trapped beneath the finish and cannot evaporate. You can prevent this condition by increasing air movement in the finishing area with a fan. All water needs to evaporate is sufficient air movement. You can also improve drying conditions by increasing the temperature in the drying area.
2. The surface is not leveling out. In hot temperatures (85°F - 100°F) the finish may dry too fast. Use General Finishes Extender to open (increase) the dry time. Finishes that dry too fast may not completely level out before all the water evaporates from the finish.
The material used to clean your spray gun depends on the type and brand of finish used.
Water Based
You have to be careful when rinsing water based finishes from your gun. Be sure to use a cleaner that is compatible with the products you use. An incompatible product can cause blushing. We recommend that professionals using General Finishes products rinse with hot water, followed by a cleaning with diluted GF Brush & Gun Cleaner with water to purge residual paint or finish. You may dilute Brush and Gun Cleaner up to 50% water. Use full strength for deep cleaning when switching from stains to clears, or paint to clears. Use a diluted solution when soaking parts. The soaking mixture is reusable for soaking after use.
Acetone can be used with care as but it can gum up any residue left behind if the unit is not completely flushed.
DIY'ers who spray occasionally can just rinse thoroughly with hot water.
Arm-R-Seal can be sprayed successfully, but we prefer hand application methods because it is very easy to spray too much in one area. If you choose to spray, use very thin coats and watch for runs (large drips that run down the side of your project).
If you notice a run, immediately wipe or brush it out. If you correct a run promptly, you will not see a mark. However, dried runs can be difficult to remove.
Wear a mask and work in a well-ventilated spray booth.
Although we spray product all the time in our workshop, with several sprayers ranging from airless to HVLP, we do not consider ourselves to be spray gun experts for all brands.
Between these two resources, you should get the information you need.
SPRAYERS THAT WE HAVE USED IN THE SHOP
The Earlex Sprayer Station 5500 is an entry-level spray gun with a self-contained pressure system that sprays our paint quite well. It comes with a 2.0 mm tip for paints and a 1.5 mm tip for clears. You can learn more about this product by going here.
The Earlex Spray Station 5500 has been used for the following GF spray demo videos:
The 3M Accuspray HG18 16570 is also easy to use, It filters the material, and the spray head is disposable. This is one of the units we spray within the woodshop. It uses a 1.5-1.8 mm tip for paints and clears. Check out the 3M Accuspray product listing on Amazon here.
Never use steel wool with water based finishes because the particles can become embedded into your project and rust. Klingspor Synthetic Wool and Mera MIrlon 1500 synthetic wool are great alternatives.
Steel Wool is still an acceptable option for oil based finishes. Liberon 0000 Steel Wool is a good choice, as it does not shred as easily as the hardware store brands.
Water Based Stains will always exhibit a bit of bleed through. When glazing with any color over water stains, we recommend some type of seal coat is applied first.
Unfortunately, the two colors you have chosen do not work very well together. Expresso will always bleed if Whitewash is applied directly over top. In the future, seal the Espresso stain with a coat of Shellac, and then General Finishes High Performance Topcoat. Allow both to dry, then apply Whitewash as a glaze (1 part stain, 1 part topcoat mix).
Here are two remedies we recommend to fix for bleeding that has occurred:
Strip away finish and start over. Stain with Espresso, top with Shellac, and then with 1-2 coats High Performance. After the HIgh Performance has dried, apply the Whitewash as a glaze (1:1 stain & HPTC). Seal with High Performance.
Paint over the bleeding stain. Seal current finish with Shellac and then paint with Seagull Gray Milk Paint.
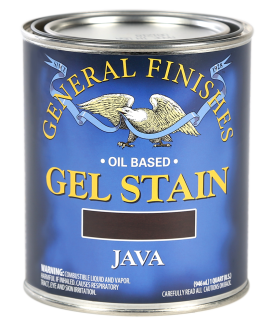
Any time you apply a light stain over a dark stain there is a possibility of bleed through. Therefore, it's important to seal off the base color first. If the look of the wood grain is not important, Dark Chocolate Milk Paint is an exact match to Java GelStain when painted, and it could be used as an alternative base color.
While Gel Stain can be applied over an existing finish, it was originally engineered for raw wood surfaces. We prefer applying the Gel Stain over a slip coat of mineral spirits instead of topcoat as shown in this video, "How to Apply Gel Stain to Raw Wood"
The slip coat will reduce the drag and help the stain "glide on" easier. The other important technique shown in this video is to apply the stain liberally in sections and remove the excess quickly. Gel Stain is so pigment rich you will get an uneven application if you try to dab it on with a dry rag.
Applying over a layer of top coat is acceptable, but there are two big benefits of applying the stain directly to the wood or over a slip coat.
The beauty of the grain is highlighted. This effect will be greatly diminished if the stain is applied over an existing finish.
Less coats are required to obtain a dark color.
Preparation and application techniques along with dry time between coats are all different when applying Gel Stain over raw wood vs. an existing finish.
Arm-R-Seal is oil based and will amber. Be sure to apply liberally with a foam brush or roller, letting the product self-level a bit. A liberal application will help you avoid streaks caused by back-brushing and pressure. Stir product thoroughly before and during application because flatting agents settle quickly in a solvent base finish.
For experienced professional finishers who spray, we recommend our two-step General Finishes Conversion Varnish, which would cure in half the time and dries clear.
Even though General Finishes products are water resistant, they are not impervious to standing water condensation (like an epoxy finish). As with any fine furniture finish, spills should be wiped up in a timely manner. We recommend using coasters to protect your wood from water condensation and pot holders to protect from heat.
It would depend on whether you plan to use the furniture outside or under the protection of a roof. Theoretically, both water and oil-based products could be used.
For example, you could "antique" wicker with thinned Gel Stain to pop up the color depth on an aging piece of natural wicker. However, Gel Stain is not exterior-rated and is very thick, making it cumbersome to apply and wipe off on a highly textured surface such as wicker.
In general, we would recommend using water-based finishes on wicker because they can be spayed.
For an exterior finish, use our Milk Paint because it is an exterior rated paint, does not require a topcoat, and has superb adhesion and color longevity characteristics. If using in an exterior space, clear coating with Exterior 450 is optional.
One challenge would be proper preparation over an existing surface. Prep sanding is not effective because of all the varied surfaces of wicker, so thorough cleaning would more essential. Use a brush and a 50|50 mixture of denatured alcohol and water.
The second challenge is that wicker moves when used so be prepared for cracking if you are using paint. Fortunately, a casual look is a popular one for porches and cracking would be acceptable.
The hardness properties of a wood finish are formulated around the objectives of use. A hard finish is desirable on projects that get heavy wear such as kitchen cabinets or table tops.
But in other situations, such as an outdoor topcoat, a desired property of the finish is elongation, which allows the topcoat to expand and contract through different extremes of temperature.
A flooring finish is another example where hardness is not the major objective of the formulation. Just like outdoor furniture, wood floors expand and contract through the seasons of the year, responding to heat, air conditioning and changes in humidity. The floor finish needs to elongate or flex as the wood moves.
This can be problematic for floors which are often subject to heavy use, including dogs nails. Pet nails will not scratch a good floor finish all the way through the wood, but the nails will indent or imprint the surface of the floor.
It is impossible to combine equal properties of flexibility and hardness in a floor finish, so you have to accept some limitations at the outset. You can improve the life of your wood floor finish by selecting a denser wood for your floors, hickory, maple or white oak instead of pine for instance.
Or just live with the indentations. This is another instance where dogs rule.
Heavy sunlight will also affect harder finishes applied in sun-saturated areas such as window sills, causing finishes to become brittle and crack.
You can keep costs down and have a better result if you match the properties of the finish to the needs of the project.
One of General Finishes hardest water based topcoats is General Finishes Enduro Conversion Varnish, which requires a catalyst and is recommend for use by professionals. It cures in half the time of most topcoats, allowing the finisher to pack and ship sooner, but the price point would make it overkill for other uses. Other factoids:
General Finishes Arm-R-Seal is GFs hardest oil finish, but it does not have elongation properties, so its great for tables but not as compatible for floors.
Although General Finishes Exterior 450 is formulated to be flexible and resist water, water-based High Performance or oil based Arm-R-Seal would work very nicely for a bathroom cabinet.
General Finishes Flat Out Flat is hard but the matting agents and additives that give FOF the look of wax impair chemical resistance
It is impossible to combine equal properties of flexibility, hardness and chemical resistance in a finish, so be sure to select the correct product for your finishing project.
You can design your own custom glazes, stains, washes, and varnishes with General Finishes intermixable water-based products. **Do not mix General Finishes Glaze Effects with General Finishes Water Based Stain (including Pre-Stain Natural) See tips and recipes below.
For all of the following mixes, GF recommends the following two steps:
Applying a base layer of High Performance Top Coat before applying your custom glaze.
Protect all of these finishes with 2-3 coats of top coat when you are finished.
PASTEL GLAZE/WHITEWASH:
Milk Paint + Winter White Glaze Effects OR Milk Paint + Water Based Whitewash Wood Stain
NOTE: Do not add more than 50% paint. If you add more than 50% you will have so much pigment that it will be difficult to wipe away the finish. **Do not mix Glaze Effects with Water Based Wood Stain.
CUSTOM GLAZE:
For example, Pitch Black Glaze Effects + Winter White Glaze Effects
Experiment with proportions and colors.
WOOD STAIN AS A GLAZE:
Water Based Wood Stain + 10% High Performance Top Coat OR
Oil Based Wood Stain + 10% Mineral Spirits
Note: Make sure that you wait 72 hours before applying a water-based topcoat on top of an oil-based stain.
AGED/VARNISH GLAZE:
Water Based Wood Stain + High Performance Top Coat 50:50 ratio OR
Dye Stain + High Performance Top Coat 50:50 ratio
CUSTOM STAIN COLORS:
1 part Milk Paint + 1 part Pre-Stain Natural [50:50 mix] OR
1 part Milk Paint + 1 part Glaze Effects - Clear Base [50:50 mix] OR
1 part Milk Paint + 2 parts Water Based Stain Natural [1:2 parts]
Note: Proportions are relative to the color you are reducing. Some colors may require 2 parts clear base to reduce strength, others may require 1. Begin with a 50:50 mix, and add more clear base if necessary.
You can further increase the color palette by mixing 2 or 3 Milk Paint colors together before adding the clear base.
The popular flat sheens are lovely but they have different attributes than glossy finishes. The flatting agents required to reduce sheen in flat or matte topcoats also slightly reduce clarity, water resistance, durability and resistance to chemicals such as ketchup, soap, chemical cleaners, or ammonia. This is not much of a concern in low use areas but is important for table tops or kitchen cabinets.
Here is a tip to improve the performance of your finish and still obtain a matte sheen: Use a semi-gloss sheen for the first two coats and a flat for the third for optimum performance.
General Finishes is constantly seeking new resins and additives to improve the performance of our finishes.
Yes, one of its uses is to dilute dye stain colors. Dye Stain reducer is the clear base the we use when manufacturing our dye stains. We make the reducer first, then add the dye color.
It is easy to make your own custom color Dye Stain by adding in 10% increments until you achieve the color you want. It is not possible to mix too much of our dye stain or reducer together.
Additionally, General Finishes Water Based Stains can be mixed into the reducer, which will lighten the color and thin the viscosity so it will penetrate deeper into the wood.
Gel Stain can be mixed with up to 50% Liquid Oil Stain but be aware that this will thin the viscosity.
We recommend starting with 10% Liquid Oil Stain and testing to your satisfaction. Add more Liquid Stain as needed up to 50%. The mix will be thin and more translucent with less color saturation and intensity, but will not lose any of its properties for adhesion and curing.
How to thin Gel Stain to create a glaze
We recommend adding up to 10% mineral spirits. You can add more mineral spirits, but test first. The mixture will thin out quickly and also reduces color intensity. Using more than 10% can affect the performance and durability of the finish, but as a glaze, this is not as critical an issue because your topcoat will protect the finish.
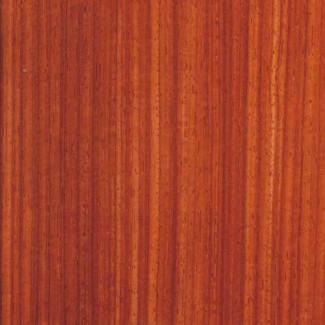
Oily woods can be tricky with any topcoat. The high oil content affects the drying process of the finish coats and Padauk has a very high oil content. Sometimes oily woods dry fine and sometimes they take weeks.
Try wiping the wood with alcohol or acetone to dry the oils before coating. This technique may help but does not work all of the time - each piece of wood is different.
Either bristle or foam brushes will work well with Milk Paint and Top Coat. The folks at GF might use several types of brushes for a project.
For example:
We like to use a bristle brush (which loads up more paint) to get Milk Paint on the surface, and then use a water or Extender dampened foam brush to smooth out the finish.
Bristle brushes are particularly helpful on vertical and detailed surfaces but they can produce subtle texture.
Foam brushes tend to produce a smoother finish which can be particularly helpful on flat horizontal surfaces.
Pad Applicators or paint rollers are also helpful on larger horizontal surfaces such as a table top.
For folks who don't want to invest in several brushes, the foam brush is our recommendation.
This response is true of prepping and existing finish on furniture, but kitchen cabinets are more problematic because they are work areas where grease, steam, food splatters and oil from hands are common. Prep is basically degreasing and abrading the surface for better adhesion. Oil or substances on hands really show up on a failed re-finish around doorknobs and hands if the surface is not cleaned thoroughly.
Because of this, General Finishes believes there is no such thing as a "no prep" paint. We would be leading our customers down the path failure if we touted our products as such. Dirt, grime, oil from hands, wax, dusting sprays that contain silicone, oil soaps or wax prevent good adhesion causing the possibility of chipping, peeling and flaking - all signs of a failed finish. This is the number one reason we see for finish failure. The second is not allowing enough dry time.
The heart of the problem is that we often don't know what was used on the cabinets previously. If dusting sprays that contain silicone have previously been used, the risk of finish failure is high. There are no guarantees with silicone - it is almost impossible to remove. Here are our recommendations. It sounds like a lot of work because it is - charge more.
CLEANING AND PRIMING:
Scrub with a degreasing detergent or Dawn dish soap first. Follow with a thorough rinse to remove all the soap.
Clean with a 50/50 mix of water and denatured alcohol. Let your piece dry thoroughly.
We prefer a 50/50 mix of denatured alcohol and water because it does not contain phosphates, is inexpensive, is readily available and does not require rinsing. You can use commercial furniture cleaners but check the label for phosphates - they will leave a residue behind that requires rinsing.
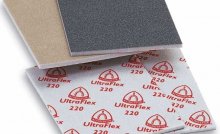
Scuff sand with a 320 Grit Klingspor Ultra Flex Sanding PAD (or 400 grit sandpaper) and remove the dust. There are other sanding PADS out there - just make sure the grit is not too aggressive or you man sand down corners and edges down to bare wood.
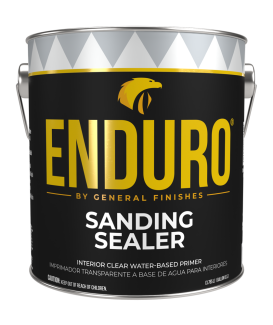
Put down a coat of General Finishes Sanding Sealer. GF Sanding Sealer can be used over cleaned and prepped existing finishes that will create a strong barrier with superior adhesion properties. The resin particle is larger so it builds fast, and finish sanding is a breeze.
(Note: We cannot comment on other sanding sealers because several on the market state dry times that are so short that our paint and stains would fail.)
You can apply Gel Stain over the sanding sealer after 24 hours.
You can apply paint or water based stain over the sanding sealer after 3 hours.
You can apply a white primer over the sanding sealer if you want to color correct for a white paint.
OTHER CLEANING INFO:
You can use vinegar, bleach or ammonia solutions, but our experience shows they are usually not aggressive enough for kitchen cabinets. We do not recommend using ammonia with water-based finishes as it can cause the finish to blush (turn white).
Never use steel wool with water based products because the particles can become embedded and rust. Some alternatives are Klingspor Synthetic Wool and Merka Mirlon 1500 synthetic wool.
Steel wool is still an acceptable option with oil-based finishes. GF recommends using oil-free 0000 wool from Liberon because it doesn't shred as easily as the hardware store brands.
NEVER USE mineral spirits to prep clean before applying water-based finishes. You can correct this problem by cleaning again with a 50/50 mix of denatured alcohol and water. Let your project dry 24 hours before applying water-based products.
PROTECT YOURSELF There are two ways to protect yourself:
Use a contract and have customers sign off on a warranty. It is extremely exhausting and frightening to be faced with a customer angry over a failed finish. You cannot warrant a finish over unknown substances. Here is a suggestion for your contracts:
We cannot warrant finishes over an existing piece of furniture without knowing the history. If products containing silicone dusting powders, oil soaps or waxes have been previously used on the piece, they may contaminate a new finish and prevent adhesion. In these situations, it is best to strip and sand the entire piece. Occasionally, a previous wax finish or silicone may be impossible to remove.
______(Initials) I acknowledge that this piece has never been waxed/polished with a silicon-based dusting spray or cleaned with oil soaps.
______(Initials) I have no knowledge of waxes, silicone-based dusting sprays or oil soap products being used on my cabinets.
Take the most used drawer or door in the kitchen and test your finish schedule first. And charge for it.
No, because the particles can become embedded and rust. Some alternatives are Klingspor Synthetic Wool and Meka Mirlon 1500 synthetic wool.
Steel wool is still an acceptable option for oil-based finishes. GF recommends using "oil-free" 0000 wool from Liberon because it doesn't shred as easy as hardware store brands.
Yes - this is not a good place to take shortcuts.GF Gel Stain gets its deep rich hue from a large number of colorants. Seal the stain with a topcoat before applying glaze to prevent "color pull."
The glaze will also glide more easily over the surface after topcoat is applied, allowing you greater control of how much color you want to use. Be sure to wait 72 hours when applying water-based finishes over oil-based finishes.
Here is a sample finish schedule:
Prep sand and clean
Apply stain
Apply a layer of topcoat to prevent color bleed thru and make glazing easier
Apply Glaze Effects
Apply 2-3 coats of topcoat to protect the entire project
Douglas Fir is a difficult wood to stain evenly.A 50|50 mix of your Exterior 450 stain color and Exterior 450 Clear would be a better choice for an exterior conditioner. Blotching may still occur even with this procedure.
After applying the conditioner mix, let it dry 2-3 hours. Allow more time in humid weather. Then a apply the stain color of your choice. Multiple coats will deepen the color.
GF's recommendation: (there are other great sanders in the market. These are the ones we are familiar with) Most pros own more than one sander as they are designed for different objectives.
SANDERS
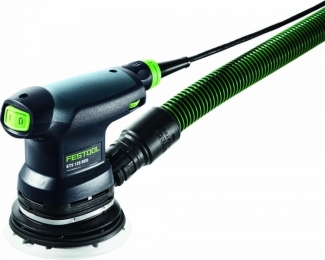
Festool and Mirka systems are designed for the serious, high production professional.
Festool is a system not limited to just sanding equipment. All Festool tools hook up to the Festool's dust collection. For those of you in the Chicago area, JCLicht carries the full Festool line.
The Mirka is a great sanding system and is comparable to the Festool. Higher-end users report finding this system worth the cost.
Bosch offers the GET75-6N 6 In. Dual-Mode Random Orbit Sander with decent performance at a more palatable entry-level pricepoint and also makes a great dust collector.
Any good shop vac will adapt to any sander that has a dust port connection. Rockler sells a great adaptor to connect your shop vac to any sander. Woodcraft offers Festool and sells many models of dust collection.
SANDPAPER AND OTHER ABRASIVES
Check out the pricing on sandpaper for all sanders at Klingspors Woodworking Shop. Klingspor is an abrasive manufacturer that has options for multiple sanders. They have 9-hole paper that fits all Festool sander for half the price of most other places.
All the Festool sanders are 9 holes on 5" sizes including the 5" Jetstream. The 6" models have 17 holes.
Mirka makes Abranet which is a mesh abrasive pad that works on all types of sanders.
SIZE
Most customers would find the 5" is suitable for furniture and cabinets. We use the big 6" Rotex on large flat surfaces like tabletops.
Surf Prep excels at the specialty 3x4" rectangular shaped cabinet sander and their big 3 2/3" x 7" sanders for flat tabletops.
Velour works best for laying down very thin coats, almost like you're spraying - perfect for cabinets. Great for Brushable White Enamel or even White Poly.
Micro-Fiber lays down a much heavier coat. Use this for full-bodied finishes such as General Finishes Milk Paints or primers. These load so much paint that they may leave a texture when using a high viscosity material like GF Milk Paint - just feather it out with a brush.
Nano Flock works best for applying thin coats of water based topcoats. They hold the product to be able to a do long strokes. These are also good for feathering out bubbles and lap marks.
Foam rollers work best for stains as they absorb a lot of product. This is helpful when staining large surfaces such as table tops. Do NOT use foam rollers with water-based topcoats - these cause it to aerate and produce bubbles.
Yes - we recommend adding up to 10% mineral spirits. You can add more mineral spirits, but test first. The mixture will thin out quickly. Using more than 10% can affect the performance and durability of the finish, but as a glaze, this is not as critical an issue because your topcoat will protect the finish.
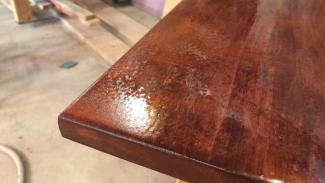
We know of many customers that have achieved great results from buffing Arm-R-Seal with auto polishes, providing that the finish has cured for 7 to 10 days.
As with all products that are not manufactured by General Finishes, always test for compatibility on a hidden area of your project before getting started.
There are several techniques by Jeff Jewitt of Homestead Finishing Products:
DRY BUFF WITH MIRKA ROYAL MICRO PAPER
Using Mirka Royal Micro sandpaper, always start with 1500-grit sandpaper. Begin with a small area, make 2-3 passes, then evaluate results. Go to a heavier grit if surface irregularities are not fully removed. Finish with 1500-grit paper.
DRY/WET BUFF WITH ABRALON POLISHING DISCS
Start by dry sanding with Abralon 2000-grit, and then 4000-grit. Start slowly, monitor to see if buildup is occurring. A large sized table might take 5-25 sheets of paper.
If lubricated, one sheet of 1000-grit or 1500-grit should do the entire table.
BUFFING/POLISHING WITH PRESTA POLISHING KITS
Spray Presta polish on buffing pad stuff to lubricate the pad. Apply a quarter-sized dab of polish to sand one section. Spread with pad. Continue section by section. Mist buffing pad with Presta lubricating material when it gets too dry. You should be able to use a buffing pad on 10-20 tables before washing and reusing.
When done, mist entire surface with and buff with a micro-cloth to remove splatter
Sand down the final finish with a 220-grit foam sanding pad, and then add another layer of General Finishes High Performance PolyurethaneTopcoat. Apply liberally than you did previously without heavy back-brushing.
Let the topcoat self-level a bit - it will tighten down as it dries.
If it's above 80°F or if the humidity is less than 70% in the space you're working, we recommend adding 10% GF Extender to the topcoat to improve open time.
Buff off the excess with a buffing or sanding pad (see below) in the direction of the wood grain. The higher/finer grit you use, the easier it will be to achieve a high-gloss finish.
Buffing Tools:
Norton Abrasives, Yellow Block
1000-grit, 1500-grit, 2000-grit
Creates a high-gloss finish
Klingspor Fusion Pads
2800- to 3500-grit
Ideal for painted and gloss finishes
Klingspor Superfine Sanding Pad
220-grit
General purpose option for rubbing out topcoats and paints with a flat or satin sheen.
Merka Mirlon Pads
Total 1500 (gray)
Total 2500 (gold)
Ideal for oil-based finishes or between coats of paint
Dry time is the recommended length of time between coats of product, often called recoat time, and cure time is the length of time recommended before subjecting your finished project to daily use. The following factors can influence your dry time:
TEMPERATURE AND HUMIDITY
All of General Finishes products' dry and cure time recommendations are subject to the conditions of the room in which you are refinishing and storing your piece. Ideal conditions are 70°F/21°C and 50% humidity. Cooler temperatures and high humidity levels can prolong dry time any from 8-10 hours.
APPLYING OIL AND WATER-BASED PRODUCTS TO THE SAME PROJECT
When applying an oil-based product over a water-based product and vice versa, dry time increases. It's extremely important to be sure your first application of finish has completely dried before applying the next layer. When switching from an oil-based product to a water-based product, wait 72 hours to apply your next coat of product. When switching from a water-based product to an oil-based product, wait 24 hours.
YOUR STARTING SURFACE
Applying product to a raw wood surface will result in a shorter dry time. When applying over an existing finish, dry time increases.
METHOD OF APPLICATION
Painting your finish on will require a longer dry time. If you are applying and then wiping off, or spraying, dry time is less.
Before adding additional coats of product, the following DRY times should be honored:
The following are average CURE times based on recommended temperature and humidity:
21 days for water-based products
30 days for oil-based products
You can use a piece lightly after about 7 days but be cautious - the finish will still be curing for another 2 or 3 weeks.
Some of General Finishes wait times might seem a bit generous but we need to account for all variables beyond our control. You can test your surface for dryness ahead of schedule by knowing what to look for. There are two ways to tell if it is an oil-based product is dry. If it is no longer tacky and it doesn't smell, it is dry. You can tell if a water-based product is dry by touching it. If its cool to the touch, it's not dry. If you can sand a water-based topcoat to a powder, its dry.
Ideal Conditions are 70 degrees F and 50% humidity. Refinishing furniture in a space that is below or above the 65-75 degrees F range can lead to problems, and a space below 55 degrees F is definitely too cold.
WATER-BASED TOPCOATS
One issue caused by cold temperatures with water-based topcoats is the development of dimples in the finish called Orange Peel.
The colder your space it is, the longer you have to wait between coats. Cold temperatures slow the dry time and affect how quickly the finish will level, harden and cure. Our easy rule of thumb is; if it is cold enough to wear a sweater it is too cold to apply a water-based finish.
If you must apply WATER BASED TOP COATS in cool conditions, add General Finishes Accelerator to speed water evaporation from the finish. Make sure the finish and the surface of the piece you are working on are at room temperature. You can warm up the finish by placing the can in hot water for 5 minutes beforehand, and if possible, move the piece back into warmer temperature after applying finishes for the 7 days of cure time.
OIL-BASED FINISHES
Oil-based finishes are not as affected by cooler temperatures, but lower temps will still slow the oxidation of the finish. GF again suggests moving the piece back into warmer temperature after applying finishes for the 7 days of cure time.
You can apply oil-based finishes in as low as 60 degrees if necessary.
WARNING: Applying OIL BASED finishes near an open flame or combustible heater is VERY DANGEROUS. The mineral spirit mixes with fumes from kerosene, for example, creating an unsafe environment.
Conversely, if you are working in HOT, DRY climates any WATER BASE finish will dry faster.General Finishes Extender can be added to water based products to increase dry time in those situations.
Ideal temperature to store product: 65-75 degrees F. Garages are not a good place to store any finish.
NOTE: We have been asked whether it is OK to paint in a 50 degrees F shop if the paint is stored at a safe temperature beforehand, and the finished piece is moved into a room with a safe temperature to dry. This approach might work, but it's risky.
First, test your surface to get a sense for the color present in the wood. To do this, wipe the surface down with mineral spirits (if you are expecting to use an oil finish) or plain water (if you are expecting to use a water based finish). See the following GF video demonstration for a better understanding of this process.
Next, apply product. Here are two recipes for a lightly stained look:
OIL BASED Finish: Create a 50/50 mix of Nutmeg Gel Stain and Gel Satin Top Coat for a natural tone. Seal your surface with 2-3 coats of oil based top coat.
WATER BASED Finish: Create a 50/50 mix of Light Brown Dye Stain and High Performance Top Coat or Enduro-Var II Top Coat. Seal your surface with 2-3 coats of water based top coat. Remember: High Performance dries clear but Enduro-Var II lightly ambers.
Test your mixture in a hidden area of your project before proceeding with the entire project.
Toning is the process of adding colorant, either dye or pigmented stain into a top coat and then applying over an entire piece in order to subtly deepen the color. All of our stains can be used: Stock base colors of RTM, Water-Based Wood Stains or Dye stains. If you are new to toning, we recommend starting with Dyes stains, which can be easier to use as they only contain dyes and no pigments.
All of General Finishes water-based topcoats with the exception of Conversion Vanish can be tinted to create lightly colored finishes for toning. It is YOUR RESPONSIBILITY TO TEST to your satisfaction before application to your entire project.
There are limits anytime you add pigments or dyes to water-based topcoats. Toning should always be done in small increments to achieve the desired color. If you are starting with a light honey tone door and you want to create an Espresso color this will take multiple coats of color including base coat of stain followed by several toning coats. It is impossible to achieve a radical color change with just 1 coat of toner.
A good rule to follow when toning is starting with a minimal amount of stain or dye, 5-10% by volume. Some colors work better than others. Normally 1-2 ounces or stain per quart of clear topcoat is sufficient to create a toner. Always test color first and strain material through a fine mesh filter to remove any undissolved particle of pigment. Once you have achieved the desired color tone apply a clear topcoat to lock in the color. Toner made with water based wood stain should be used at point of use only. Do not store for extended periods of time.
Yes, there are a couple of ways. Dye Stain Reducer is the clear base that we use when manufacturing General Finishes Dye Stains. The Reducer is made first, then the dye color is added.
It is easy to make your own custom color Dye Stain by adding in 10% increments of Dye Stain color to Reducer until you achieve the color you want. It is not possible to mix too much of our Dye Stain and Reducer together.
Additionally, General Finishes Water Based Wood Stains can be mixed into the Reducer, which will lighten the color and thin the viscosity so it will penetrate deeper into the wood.
Renewable resources are a recent, eco-friendly advancement in the paint and coatings industry.
They are comprised of plant proteins such as corn; as well as conventional and innovative oils derived from plants such as Euphorbia lagascae, Vernonia galamensis from the sunflower family, and Calendula officinalis, aka marigold.
General Finishes products formulated with renewable resources meet the standard of excellence you have come to expect — including adhesion, coverage, color and durability — with all benefits of water finishes.
GF coatings made with Renewable Resources are: Enduro-Var II, Milk Paint, Water Based Wood Stain, Exterior 450 Stain and Wood Turner's Finish. Look for the green icon!
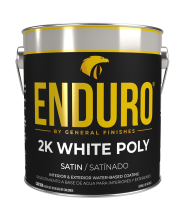 Enduro Water-Based Tintable 2K White Poly
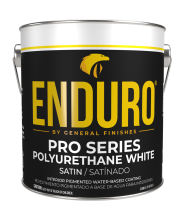 Enduro Water-Based Pro Series White Polyurethane
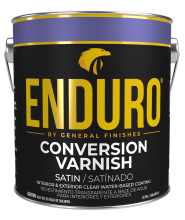 Enduro Water-Based Conversion Varnish
 Enduro Water Based Stain Blocker Primer
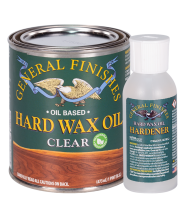 Hard Wax Oil & Hardener
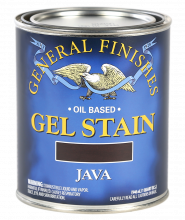 Gel Stains
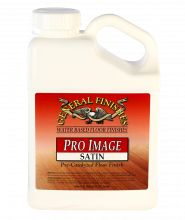 Pro Image Flooring Topcoat
 Jen Poly Brushes
 Stir Stix
 Ultraflex Softback Sanding Sponge